In part 1 of my SageMC Movie Library Spotlight I showed you how SageTV can organize & play movies stored on your server/hard drives and/or those movies on physical media. We used SageMC's IMDB to import movie metadata one-by-one into SageMC. With a large collection, you might prefer a more automated way to import movie metadata all at once.
Now in Part 2 of the SageMC Movie Library Spotlight I'll show you how to easily organize your movies with covers and metadata (titles, genre, overview, actors etc) in SageTV with DVD Profiler - one at a time or better yet multiple movies imported at once. In the end, you'll have a Movie Library that has your movies organized and accessible all from any SageTV interface whether it's on your HTPC computer, an extender or your over the internet. Home Theater PC Movie Nirvana is here.
REQUIREMENTS:
- SageTV
- SageMC UI
- DVD Profiler (free to try, $30 to buy)
DVD Profiler helps you catalog your DVD collection. This program catalogs and organizes your DVDs and other movies with metadata, covers and more. DVD Profiler has many other features, but for this article, I'll stick to the task at hand. Basically we'll use DVD Profiler to add each movie to it's catalog list, import the metadata and image covers and then export that data into a usable format for SageTV.
You can download and install DVD Profiler from their website
Run DVD Profiler
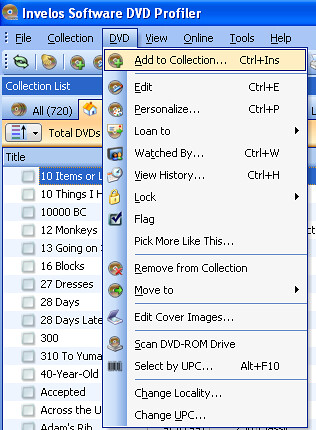
Add a DVD by selecting DVD>Add to Collection from the Menu
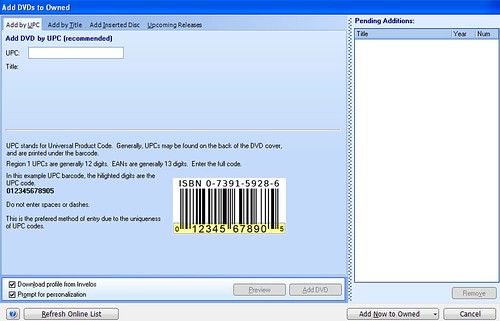
DVD Profiler can scan your UPC code from your DVD itself or you can input the UPC.
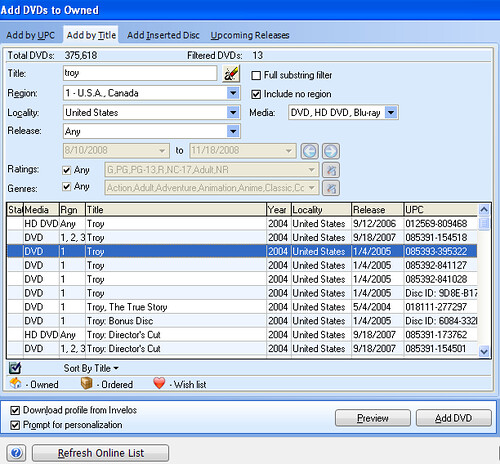
Alternatively you can add the DVD by typing in the title. Once you've found the proper movie title, select that title and select the "Add DVD" button.
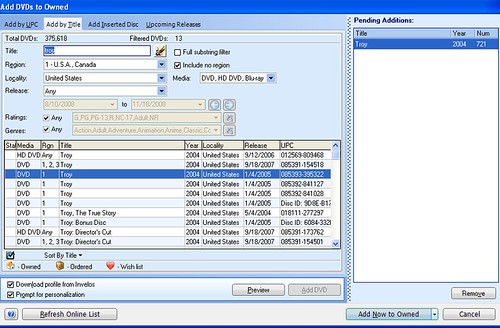
You'll then see the movie in the "Pending Additions" section at the top-right of the DVD Profiler program
You can add as many DVD Titles as you need and then select "Add Now to Owned" button to add all of the movies to your collection.
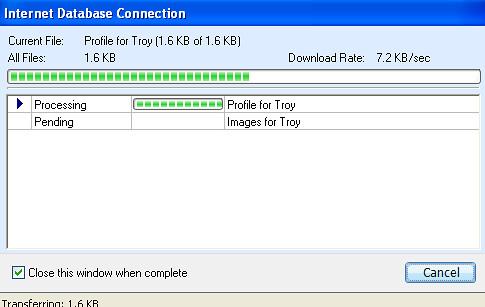
.
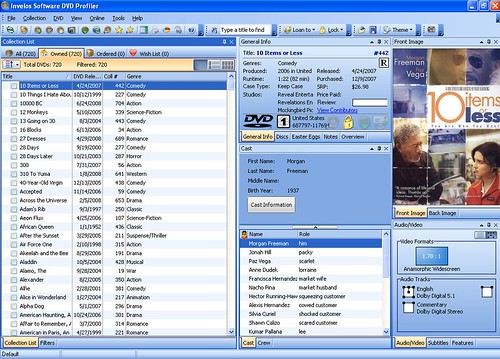
Once added, you should see the movie listed in your movie collection on the main DVD Profiler screen
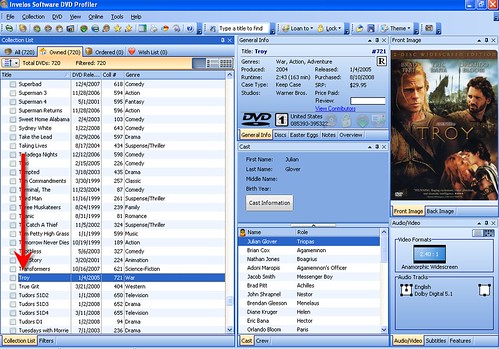
Make sure the DVD Title agrees with the folder name (or file name for video files) where those movie files are located. These must match.
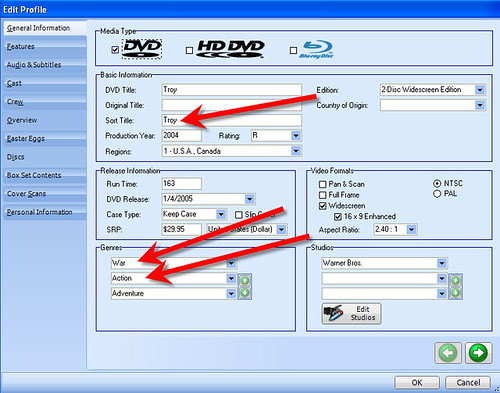
In DVD Profiler each DVD has the following properties:
Movie Title - this is what SageMC displays in the user interface
Sort Title - not used by SageMC
Original Title - if you want the movie title to be something different than the name of the movie file or folder name, make this match the movie name/folder name and use "Movie Title" for the displayed name.
Note that the first two Genre's you choose will be used to organize that movie in SageTV. Check these to ensure you agree with the Genre category. Once finished, select the OK button at the bottom right.
Once you've added all of your movies, select File>Export Profile Database from the DVD Profiler Menu.
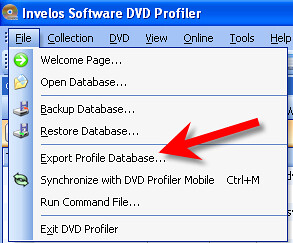
Make note of where the "collection.xml" file is being exported. This file contains the metadata that SageTV will be using to organize your movie collection.

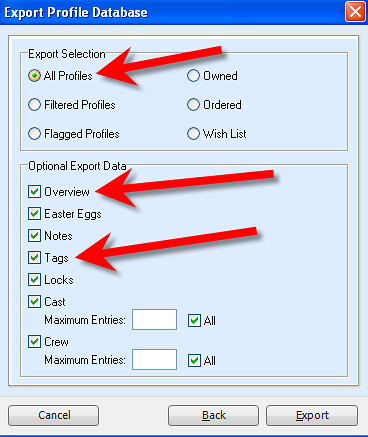
You select what metatdata gets exported. Be sure you select all profiles, overview, tags, and any other data you want accessible in SageTV for your movie collection.
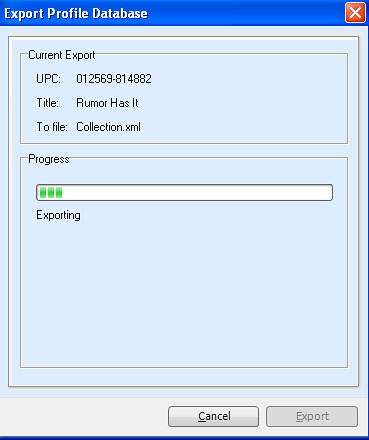
Once you select Export it will one-by-one export all movie metadata into the collection.xml file.
IMPORTING DVDPROFILER DATABASE INTO SAGEMC
Now in SageMC (the user-made replacement UI for SageTV), go to SageMC Options.
Under Paths, select "collection.xml" which should be in the following directory:
"C:\Documents and Settings\PCNAME\MY Documents\DVD Profiler\Databases\Default\"
If you exported to a different directory you will need to point to that directory.
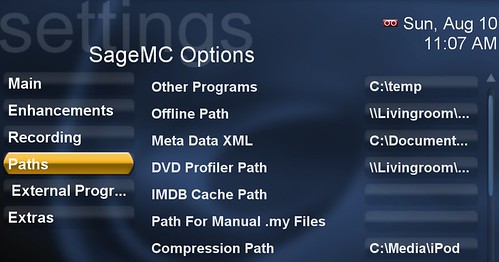
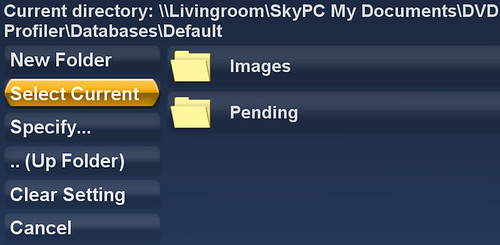
Under Paths, select "DVD Profiler Path"
This will tell SageTV where to find the Movie Cover Images saved by DVD Profiler. The default location for this is:
"My Documents\DVD Profiler\Databases\Default\"
Now from the main SageTV menu, select "My Movies"
Select the "options" button. You can use the right-mouse-click or "escape" button to get to options. This will bring up the Video Library Options menu.
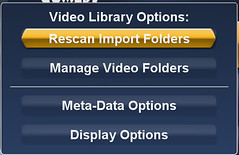
Select "Rescan Import Folders" to import the actual video files and/or movie folders (ripped movie files) into SageTV. Once you have done this, you should see all of those movies listed under "unassigned" genre.
Now from that same menu, select "Meta-Data Options".
This will bring up a new menu - from here select "DVD Profiler Refresh"
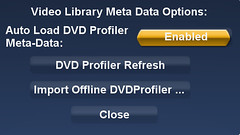
This should import all of the metadata from your DVD Profiler list and match that data up with your movies you've imported into SageTV. You will now have all movies listed in SageTV by title, genre and folder. Also imported will be the description and other metadata from DVD Profiler.
You now should have your movies imported into SageMC all organized by genre with metadata and cover images. Open up any of your SageTV client PC's (softsled), your extender or even SageTV Placeshifter or Web Server to view across the internet.
Note the following rules to follow if you're using SageMC and DVD Profiler to Import Movie Data:
Rule #1
Your Media Import Directory with ripped DVDs must not be a subdirectory:
eg. if your movies are organized this way:
mediaserver\media\movies\movie1\video_ts\
mediaserver\media\movies\movie2\video_ts\
mediaserver\media\movies\movie3\video_ts\
mediaserver\media\movies\movie4\video_ts\
then your import directory should be mediaserver\media\movies\ and not mediaserver\media\
Rule #2
Your ripped DVD must have the video_ts.bup and the video_ts.vob file
If you have any questions, feel free to post them in the comments or head over to the SageMC forum thread for more information.

