Showing posts with label How To. Show all posts

Wednesday, August 18, 2010

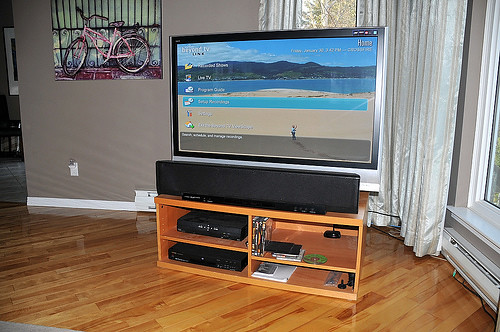
HTPC Build - Under Cabinet Mini HTPC

UnderCab HTPC

I’ve always been a proponent of extenders for getting media to your TV.  But for a full-blown HTPC the bigger and sometimes noisier desktop works pretty good.  That isn’t always the case though.  Sometimes you want a smallish HTPC server that can still handle TV recording. 

At the UsingWindowsHomeServer blog, Timothy chronicles the build and results of his new mini-HTPC that fits nicely under a cabinet or desk.

From the article Timothy describes his reasons for going this route:

“The issue that I have is that this PC is not very energy efficient and the garage gets to over 100° during the summer months when I am at work. In addition, if I want to watch TV in the garage (assuming a tuner is free) and I am recording then my performance drops.

Build a dedicated PC to record those wonderful HD streams that SiliconDust provides me of course! “

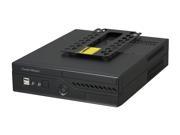
COOLER MASTER Elite 100 RC-100-KKP3-GP Black Computer Case

For a case he used the COOLER MASTER Elite 100 which he bought for $70 at Fry’s, but I also found online at Newegg for the same price after shipping.

He added an Intel Celeron E3300 2.5GHz Dual-Core Processor $52 at Newegg, a Zotac Zotac Board for $80, and CORSAIR 2GB DDR2 SDRAM Memory for $65 at Newegg.  The hard drive he already had and added an under cabinet LCD mount he found on eBay.

Most importantly the SiliconDust HDHR Tuners (Currently $145 at Amazon) allowed TV Tuning over the network so he didn’t have to have the tuners inside the tiny case.

An interesting read and a unique HTPC server especially since he’s using the Windows Home Server with it.  Check out the entire build log with photos and more explanation at UsingWindowsHomeServer

Monday, August 09, 2010

SageTV Basics – Custom Themes

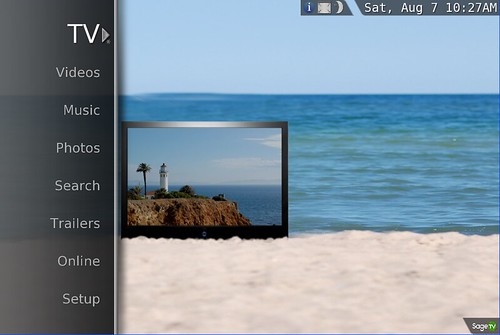
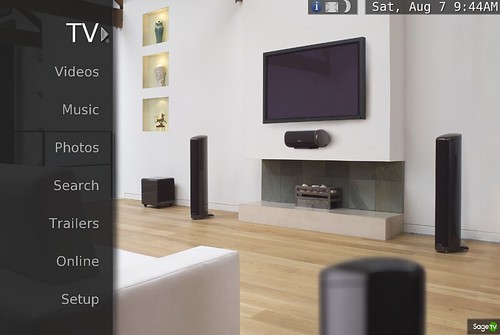
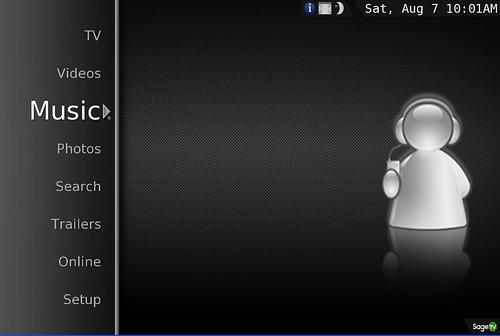
Since SageTV 7 was released to beta this year there have been several custom themes created to change the look of your SageTV user interface.  Today we’ll take a look at each of the currently available themes and run through the basic steps for installing custom themes.

Themes versus UI Replacements

Before we get started I wanted to review the difference between a custom theme and a full UI replacement:

Full UI Replacement and/or Add-on = Thes not only change the backgrounds and icons, but also change the way the user interface works and even modifies the layout.  We’ll take a look at these in a future article.

Custom Theme = A theme changes to appearance of the user interface.  This can involve different backgrounds, different fonts, icons etc.  The menus still work the same way and the layout remains the same.  This is our focus today.


Themes Available to SageTV 7 Today:

In this article I’ll only show a few screen-shots to give you an idea of the theme.  I’ll do a more in-depth look at each theme individually with screen-shot and demo videos in a later article.

Standard SageTV 7 Theme

This isn’t really a custom theme.  It’s the theme that comes bundled with SageTV7 and is what you see when you install SageTV 7.  Keep in mind though that the standard UI could change a bit in SageTV 7 once it is released from beta.

SageTV 7 Standard Theme


Serenity

This theme is my favorite of the bunch and the one I use most of the time.  The backgrounds are easy on the eyes, the highlight showing the focus of the menu is a bolder orange that makes it easy to see where you are in the guide or menu (a feature MrsGeekTonic really likes).

SageTV Theme Serenity 1

Serenity Theme Forum Thread


Opaque Panel Theme

This theme basically takes the standard SageTV theme and makes the panel backgrounds opaque.  Not a big difference, but some users found the new semi-transparent panel backgrounds hard on the eyes so this plugin was developed to address those requests.

Opaque Panel Theme Forum Thread


MBDiamond

MBDiamond Theme Forum Thread


BlueTwo Grey

This one was just added to SageTV 7 this week and will be familiar to many long-time HTPC users.  BlueTwo has been around older versions of SageTV, XBMC, Media Portal and others.  This is a version updated for SageTV 7.

BlueTwo Grey 1

BlueTwo Grey Theme Forum Thread


Plucky’s Theme

This theme goes along with Plucky's Menu Mod plugin (more than just a theme) which does the following:

1. Modifies the main menu to a horizontal orientation
2. Adds the ability to remove items from the main menu which you do not use.
3. Adds the ability to rename any main menu items to a name of your liking.
4. The bar can be moved to the top,middle or bottom of the screen.

Here’s a video showing it in action:

Plucky’s Menu Mod Plugin & Theme Thread


How to Install New Theme:

The steps to download & install a new theme are fairly easy.

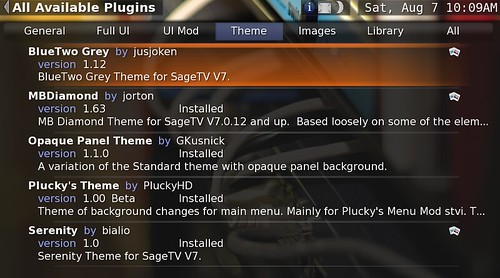
1. Go to the Setup>SageTV Plugins>All Available Plugins> page

2. Select “Theme” from the Plugins menu

3. All available themes will be listed like you see in the screen-shot below.

SageTV Theme Install 5

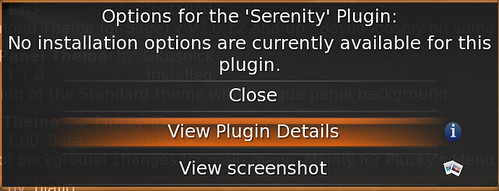
When you select any of the available themes, you’ll have the option to view plugin details including version history and you can also view any screenshots the plugin developer provided – right from the UI.

SageTV Theme Install 6

4. Select the theme you want to install by pressing the enter key on your remote control.  It will download from the SageTV.com server & then ask you if you want to load the new theme – select yes if you want the theme to load and replace the theme you have been using.

SageTV Theme Install 3

5. The status bar will indicate that the new theme is loading

SageTV Theme Install 4

6. Once the new theme is installed (should take a less than a minute) you’ll see the changes to the background, icons etc.

That’s it.  Pretty easy!

How to Change The Theme After Installing

Lets say you have several themes installed already in SageTV and you want to switch to a different installed theme.  Here’s how you do this:

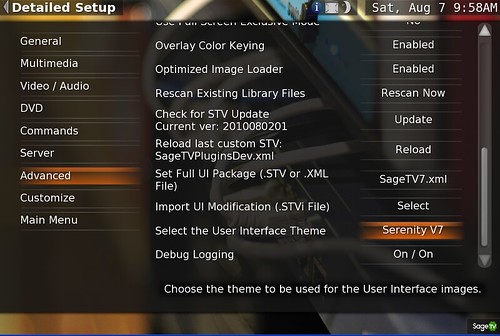
1.  From the SageTV Main Menu go to Setup>Detailed Setup>Advanced>Select the User Interface Theme>

SageTV Theme Install 1

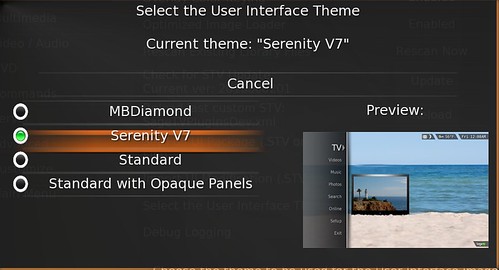
2.  You’ll see a screen like the one below:

SageTV Theme Install 2

3. Select the theme from the list (this will only show themes you’ve downloaded & installed from the Plugin Menu.

That’s it.  Again pretty simple.

Uninstalling or Updating a Theme

If you want to upgrade a theme that has been updated or uninstall a theme, head back to the Plugin Menu at: Setup>SageTV Plugins>Installed Plugins> page.  Here you can update or uninstall any of your themes.

Tuesday, May 18, 2010

Moving Imported Video into TV Recordings – SageTV Tip

One of my many hang-ups with HTPCs is organization of the media.  In my perfect world, all TV shows up under TV regardless of whether it is something I recorded using my HTPC tuners, something I imported from a video file or even a ripped TV-series DVD from my DVD collection.  When someone using my HTPC is looking for a TV show it should always be listed under TV.
The problem with this is SageTV sees things differently.  If you import a video file – even if its a TV show it knows it hasn’t been recorded from the DVR function and therefore relegates it to “Videos.”  So what’s a perfectionist to do?
The answer is actually quite simple although I haven’t found a clear-cut how-to on this so I decided to write one myself to help out other overly-orderly SageTV users like myself.
There is another method that involves a very impressive metadata manager for SageTV called BMT (Batch Metadata Tools).  I’ll hold that method for a future how-to for now and focus on this simple method using SageTV Web Server:
The complete how-to after the jump…

Monday, April 26, 2010

Make Your Own DVR, Movie, and Music Server – HTPC Basics

Unless you’ve been living under a rock or two, you probably already know what a DVR can do.  And you very likely have seen and possibly even used a TiVo – a powerful and easy-to-use DVR.  But have you ever considered making your own DVR – one that runs from your home computer?  Many who read GeekTonic have done just that. 

But countless others have either considered it too much work, too difficult, too expensive, too geeky or some other excuse.  If you’re one of those who hasn’t tried transforming their computer into a DVR or one who has tried unsuccessfully, this primer is for you.  And if you are already the proud owner of your very own HTPC, you’ll still learn from this series.  This is the first of a article series with the goal of helping you understand the pros and cons of Home Theater PCs (HTPCs), how to build an HTPC, which software and hardware to use in your HTPC and the amazing things you can do with your HTPC.

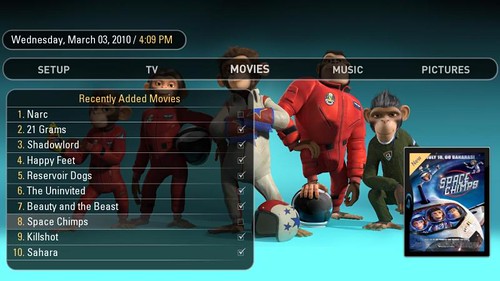
An example of a nice UI for a HTPC Movie Server

What is a HTPC?

A Home Theater PC or HTPC for short is a “appliance” that takes a computer, adds software all with video & music playback and usually video recording capabilities to make a device many call a “Media Center.”  Think of it as a home theater super-set-to-box that combines everything media-related into your computer to power your TV and audio system.  The HTPC can be controlled with a keyboard and/or mouse, but typically a remote control is added to give the user that “10-foot user interface” so you can control everything on your TV and audio system from the comfort of your couch.  In it’s full-implementation, the HTPC acts as the DVR, DVD player, Blu-Ray player, Movie-on-demand, Online Video display, music jukebox, TV Guide, internet radio player, and home automation controller all in one device.

In more complex setups, one HTPC “server” can power multiple TVs throughout a home all with once point of recording & storage, but controlled from the remote control at each TV set.

Why HTPCs?

I remember when I first began piecing together my first HTPC.  My family and friends didn’t understand why.  Those who haven’t witnessed a well implemented HTPC setup often ask these questions:  Why would anyone put a computer in the living room?  Why would you go to so much trouble to set that techno-monstrosity up and maintain it?  Why do you need a computer to do what your $10 per month cable company DVR box can do?

I asked HTPC users this same question on twitter and one of the best answers was this from Jason:

I use an HTPC “to get what I want, where I want, when I want it. Lower recurring costs, media aggregator, commercial skip, whole home dvr”

The answers to those questions depend on the person asking of course.  But here are a few of the many reasons you might consider an HTPC for your setup:

  • HTPCs give you more control over your media
  • Record as many channels as you want.  I have six tuners in my setup although I’ve seen many more in other HTPCs.
  • Store as much TV content as you can afford to store with hard drives.  2 Terabytes or more of TV recording storage isn’t uncommon with HTPC users
  • You can convert and move media content to other devices.  Converting recorded TVs and movies to other formats is easy with HTPCs as the content is usually not locked down inside that “black box.”  Moving or copying content onto your mobile devices is typically not a problem and definitely much easier than with a DVR or other non-HTPC device.
  • Whole home DVR, music & movie server – watch a show in one room, move to another room and resume that same show where you left off!
  • Rip your DVD, Blu-Ray, and music collections for easy access from your remote in any room of the house
  • Cheap or better yet, free DVR
  • Instant Commercial Skipping with the press of a button – not just 30 second skip, but real commercial detection so you can click a button on the remote to skip to the end of the commercial.
  • Easy Access to Online video content on your TV.  Get your TV and movie content streamed from online sites to your TV.  And I”m not talking about that cheesy, “online” functionality built into those new TVs & Blu-Ray players either.  Real, online media browsing and viewing all inside the same user interface controlled with the same TV remote control you use to watch TV.

TiVo Premiere

  • No monthly fee for the Tivo service or DVR rental.  Obviously you can take this as far as you want to – some go without cable or satellite service completely and get their content over the air and from online sources so these folks have no monthly fees.  Others like me subscribe to cable, but not to DVR rentals so we’re reducing our monthly fees.
  • A PC connected to the TV can bring you additional functionality.  Gaming – even old school games using MAME, online video, web browsing etc.

There are countless other reasons to build and use a home theater PC.  Let me know in the comments if I missed any big ones.


Challenges for HTPCs

Now that we’ve covered some of the reasons you might want to implement a HTPC for your home media setup, it’s a good time to discuss the other side of the coin.  There are many challenges to building, setting up and maintaining your own HTPC including:


  • Trying to do too much.  The more you multi-task with your HTPC, the more likely you are to have issues.  Treat it like an appliance and you’ll be happier with it long-term
  • Computers have many possible points of failure.  The operating system annoyances & crashes, hard drives crashes, video card difficulties, overheating etc etc.
  • Getting things set up can be difficult and time consuming.  Depending on your experience with computers the setup process can be difficult and overwhelming at times.  There is simply a lot to learn when you build your first (or even second) HTPC.  We’re not talking plug-it-in and play here.
  • Recording cable & satellite content is getting more difficult, not less.  Cable companies are beginning to move channels away from the open, analog and towards the more closed digital.  And satellite company boxes are even more difficult to record from.  There are solutions for HTPCs here, but you need to do your homework so you know what you’ll be dealing with.  This topic will take at least an entire article to cover it properly.  Just know you can’t always plug your CATV cable into any PC TV tuner and always expect it to begin recording.  Sometimes it IS that easy, but better to know what your situation is first.
  • Have you ever jumped into the world of codecs and videocard drivers?  It can get messy very, very quick if you’re not careful.  It is NOT rocket science, but it can seem that way if you aren’t careful.  I’ll go into the basics in this area in a later article also
  • That TiVo or DVR or Fios or whatever is pretty darn easy – and sometimes it does enough for your situation.  Even if it’s not quite as powerful as an HTPC, sometimes its good enough for you.

There are definitely more challenges – let me know if I missed any of the big ones.

Up to the Challenge?  How Do I Get Started Setting Up My Own HTPC?

You now know the main pros and cons of HTPCs.  If you’re still curious and think you might want to get started with HTPCs stay tuned.  Here’s a taste of what will be covered in the next few HTPC Basics articles on GeekTonic:

  • Which Operating System for HTPCs?
  • What HTPC software?  How do I choose?
  • Recording it All – How do you record from OTA, Cable, Satellite etc?  Which Tuner?
  • Getting it to the TV – Extenders, Game Systems, HTPC computers oh my!
  • Building the perfect HTPC/Server HTPC/Extender etc
  • Control via Remote Control – Which Remote Control
  • Where to go for help

My goal here is to provide the framework to help those who decide they wish to power their media throughout the home with the HTPC.  After completing this series, you should have the basics to set up and run your own HTPC and how to make it work perfectly for you.

More Coming Soon…

Stay tuned to GeekTonic.  This series will walk you through everything you need to consider and do to make the perfect HTPC for your home.

Thursday, February 04, 2010

DirecTV Serial/USB Channel Changing for Hauppauge HD-PVR using DVBLink

A few months ago David shared his step-by-step, how to setup the Hauppauge HD-PVR on MediaCenter with DVBLink.  Today he takes that how-to a step further and shows his method for channel changing – read on for all of the details.

NOTE:  This is a guest post by DavidBasic guidelines for writing and submitting your own guest post at GeekTonic can be found here.


Many people have trouble setting up serial/usb channel changing using DVBLink, DirecTV and Windows 7 Media Center.  I am going to show you the software, hardware and steps I used to get channel changing that is 99% accurate (sometimes it misses the NFL Sunday Ticket HD sub channels).

Software used

  • HDPVR IrBlaster Bridge - This is a drop in replacement for the Hauppauage IR Blaster DLL. It currently supports talking directly to the DirecTV STB via the serial port.
  • (Optional) DirecTV Channel Control v1.0- This is a utility that will allow you to change channels and control your external direcTV set top box using the low speed data connection (home control) port in the back of the receiver.  This is only needed for the NFL Sunday Ticket HD

Hardware used

  • DB9, F/F, Null Modem Mini Type – monoprice
  • 2 USB to Serial Convert Cables (DB9M/USB B female converter and USB A/B cable) – monoprice

Steps to setup

Install HDPVR Ir Blaster Bridge.

Connect the USB to Serial Convert Cables to the DB9 Null Modem and install the drivers.

Setup DVBLink to use the HDPVR IrBlaster Bridge or the custom hooks(Optional).

Optional

NFL Sunday Ticket and some of the other DirecTV sports packages use sub channels for the HD channels (ex. 703-1).  I had to use the following to allow me to be able to correctly change channels to the sub channels.

Download DirecTV Channel Control.  Extract it to a folder, I just put the directv.exe in C:\ to make it easy to find.

Edit the change-channel.cmd file located at C:\Program Files\DVBLogic\DVBLink\Data\HDPVR\Hooks.  My channel-change.cmd code change-channel.

Conclusion

After following the above steps I was able to have 99% accurate channel changes through USB.  It was faster and more reliable than using an IR blaster and it only cost about $18 for the extra cables and adapters.

About the author:  David is an HTPC and Home Theater enthusiast.  He has a Bachelor's of Science in Computer Science and is currently working at a Private College in Virginia as a Web Technical Analyst.  He has built a theater in his basement from scratch.  He did 80% of the work himself.  After starting with XBMC on the original Xbox, he moved to an HTPC running SageTV, then now to Windows 7 Media Center.

Read more of David’s HTPC writings on his website

Monday, December 21, 2009

SageTV HD200 – DTS Shortfall and How To Overcome It

Do you have lots of MKV files?  Do those MKV files have DTS only audio tracks?  Don't have a DTS capable receiver/TV? Then SAGEAudioConvert is for you. 

NOTE:  This is a guest post by DavidBasic guidelines for writing and submitting your own guest post at GeekTonic can be found here.

Developer mikep has create this very handy tool.  It uses a few freeware tools (eac3to and mkvtoolnix) to automatically scan an input folder, create an AC-3 track then remux the new track into the file.  The tool is in beta, but it helps to overcome one of the few shortfalls of the HD200 extender.  As most know, the HD200 will not decode DTS tracks.  By adding the AC-3 track to the file the user is able to switch to the AC-3 track by hitting the audio button on the remote.
SAGEAudioConvert is currently a command line tool and the author (mikep) even posted his SJQ code to run the tool when sage finds the new file in it's automated scans.
There are several options to use and more can be found at the sage forums.
Current SAGEAudioConvert post
http://forums.sagetv.com/forums/showthread.php?t=45902

About the author:  Dave who goes by the screen-name "hugenbdd" on the SageTV forums is a reader of GeekTonic and SageTV user.  He also wrote the how-to on “placeshifting with the SageTV HD Theater

Monday, December 14, 2009

Windows 7 MCE + DVBLink for HDPVR = HD Happiness

Readers of GeekTonic know I’m a fan of the Hauppauge HD-PVR and it’s ability to take component video in and allow you to record all of your Cable or Satellite channels on your HTPC.  You probably also know that’s supported with HTPC software like SageTV and BeyondTV, but not with Windows 7.  Well David has written up the process for getting HD-PVR support in Windows 7 Media Center – read on for all of the details.

 NOTE:  This is a guest post by DavidBasic guidelines for writing and submitting your own guest post at GeekTonic can be found here.

Install Windows 7

I did a clean install of Windows 7 Business.  I ran Windows Update and installed all the Important updates.

Install the latest drivers for your graphics card

Windows Update didn’t give me the latest drivers for my ATI HD 2600 XT.  Having a card that has a hardware h.264 decoder is recommended if you plan on using your HTPC to connect to your TV to cut down on CPU usage.  If you plan on using the Xbox 360 as your extender then the h.264 decoder is not needed.

I use my HTPC in my theater and 2 Xbox 360s in the rest of the house.

Attach Hauppauge HDPVR and install the latest drivers

I downloaded the latest drivers and installed them.  The version I used is 1.5.6.1

You will also need to install the IR blaster configuration program, I use USB to change my channels, but that will be covered in another post later.

Download DVBLink for HDPVR 2.0 Beta 3

You can try it for 15 days before you buy it.

Install DVBLink

  1. Run HDPVRBridgeSetup.exe
    install1 install2 install3
  2. Click Always trust software from “Tabekc”
  3. Reboot and finish install.

Read on for the full how-to on Setting up Hauppauge HD-PVR support for Windows 7 Media Center:

Thursday, December 10, 2009

The Perfect HTPC Graphics Card

Are you still hunting for the best graphics card for your HTPC? Well, you are not alone! Many enthusiasts are still searching out there for the perfect graphics card. Why does this search never end? The answer to this has got to do with the varying factors which people take into consideration while choosing their HTPC card. Sooner, rather than later, they realize that one of the factors they initially didn't consider as really important comes back to bite them.

You've received a Picture Message


As a consumer who has tried out and experimented with offerings from all the 3 leading graphics card manufacturers, I can tell you that that every manufacturer has an advantage in some aspect or the other. This post will dwell in detail on the two major components of the HD HTPC experience, namely, video and audio. At the end of the post, I will also examine miscellaneous aspects which affect the consumer choice.

Read on for an in-depth look at choosing the right Video Card for your HTPC

Wednesday, December 02, 2009

A Guide to Troubleshooting Standby – MissingRemote

HTPC blog MissingRemote has a nice guide to troubleshooting computer “Standby” to make your HTPC work more like a consumer electric device instead of a cranky computer.  It’s written by Andy Van Til (babgvant), author of DVRMSToolbox and is a must-read for anyone who uses HTPCs.

Check it out at MissingRemote.com

Tuesday, November 24, 2009

Stop PowerDVD Autoplay

One of my biggest software peeves is when a software program assumes it should control the behavior of your computer without the ability to easily change that behavior.  Cyberlink PowerDVD is one of those programs – I use it sparingly on my HPTC server for playback but mostly for the codecs it installs.  But when you install it it changes windows autoplay settings so that just about any media disk you put in your drive, it automatically starts PowerDVD and begins playing the media.  Now maybe that’s how some users want it, but I don’t.  Typically I’ll be viewing my media through my HTPC program – not PowerDVD.

PowerDVD Logo

So how do you disable the autoplay?  I’ve tried going through the settings in Cyberlink and they just don’t work.  So instead we’ll use Windows settings to do this.  With Vista or Windows 7 follow these simple steps:

full how-to with screen-shots after the break

Sunday, November 22, 2009

Commercial Skipping With SageTV – Comskip and Dirmon2

No TV Commercials

When I answer the question, “why use a Home Theater PC (HTPC)?”  I usually start by showing off the commercial skipping feature – one of the favorite features at my home.  As a commercial begins on any TV show we’re watching time-delayed, we can simply hit the right-arrow button to skip to the end of that commercial.  It makes TV viewing so much better.  This article is a how-to on using one of the better methods of commercial detection for SageTV – Comskip and Dirmon2.  Read on for a simple how-to on setting it up.

OVERVIEW OF COMMERCIAL SKIPPING WITH SAGETV

SageTV is an excellent HTPC software program that transforms your home computer into a powerful, supercharged DVR with many additional features than you would find with your cable or satellite box DVR or even your TIVO.  Commercial detection and skipping isn't built-in to SageTV, but is free and easy to set up.  NOTE:  skipping based on a set time (default skip is 3030 seconds, but is configurable to other time lengths) is built in to SageTV.  SageTV's Website

At the GeekTonic home we rarely watch commercials any more except for the occasional sports program.  This is because it is so easy to install an add-on into SageTV that analyzes your recorded shows and marks the start and end point of most commercials so you can quickly skip over the commercials and go straight to the content. 

Here's how it works once installed.  When you hit the play button on your remote control a status bar appears at the bottom of the television screen like this one:

skipbar

You'll note the dark green portions of the status bar, these are the commercials that were detected.  When you hit the skip button on your remote control (my skip button is mapped to the "right" button on my remote control) it will skip to the next start or end point of the next commercial.  You can skip back the same way with the back button as well.  It works much like the chapters in DVD's with the start and end points of each commercial acting as the chapter marks.

To give you an idea of how commercial skipping works, check out this very-short screen-cast I made while viewing a SageTV-recorded television show:

In the video I press the play button on my remote to show you the status bar during playback of a show.  Then the show gets to a commercial - at this point I hit the skip commercial button and it goes to the end point of that commercial.  If for some reason the commercial detection was off a little, I can do a rewind or fast forward a few seconds to get to the correct spot.

Read on for a very detailed how-to on setting it all up.  I’ve leaned toward giving more detail than needed just in case but it should be a very easy and quick install.

Thursday, October 29, 2009

New Windows 7 Laptop – Ideal Install For the Non-Geek

This past week I purchased two new laptops for the extended family.  They didn’t want to pay the extra price for the Apple thing so I encouraged them to wait for Windows 7 to arrive.  Thus far that decision was a good one.  Windows 7 was easy to configure and gave me zero problems even with some older hardware and software they wanted.  Here’s what I did to get their Windows 7 laptop ready for the non-techie to use and enjoy:


  1. Uninstall All Useless Programs (crapware as we call it).  Not as much crapware installed on the laptops I picked up which was a nice surprise but I still had  a few programs to uninstall.  Alternatively you could just reinstall Windows 7 to ensure it is a completely fresh install but I didn’t want to take the time in this case.
  2. Configure users and passwords.
  3. Uninstall the “trial” virus scanner program that was already installed and instead download and install Windows Security Essentials which is a very lightweight virus scanner.  If you feel like you need more you might want to install  AVG Free Anti-Virus which is a capable, but lightweight program I’ve used on other installs.
  4. Install Spybot Search And Destroy.  Yes my family (especially the extended family) will need this eventually
  5. Install VLC Media Player – no more “why won’t this file play on my PC?” comments
  6. Install CCleaner.  Best way to keep that PC clean for free
  7. Install 7Zip.  Best unzipping program available and it’s free
  8. Install Google Talk Chat so they can use that newfangled video camera built into their laptop.  Set them up with a google account if they don’t yet have one.
  9. Install DOPDF for free printing to PDF capability
  10. Pick a nice theme and/or background for them.  Add a few simple, but useful gadgets like weather, time and a photo slideshow.
  11. Set up Remote Desktop or in my case I installed the free version of LogMeIn which I use to remote into my relatives PCs when they need assistance (yes I seem to be the free helpdesk guy for the family…)
  12. Do a complete backup with windows restore and save those DVDs somewhere safe.  Set up a regular backup plan.

Keep in mind these are laptops for family members that live a ways away from me and will be used for those with lower-than-average technical skills.  For instance my mom asked “what is this Media Center thing?”  I let her play around in it and she asked “can I record TV on here?”  I quickly said “no mom” and let it be.  It’s just not worth it in this case ;)


What about you?  Do you have a different method?  Anything in particular you do with a new laptop – particularly Windows 7?

Tuesday, September 01, 2009

DIY HDMI and USB Over Ethernet – An Extender Alternative

Remote Locating your HTPC, or accessing your HTPC Server remotely with video and a remote control.
HDMI over Ethernet
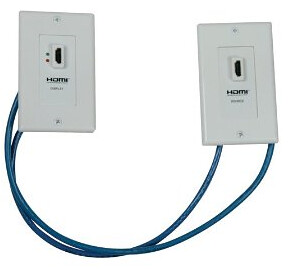
Looking for a relatively inexpensive way to connect a TV in your home to your HTPC server?  Perhaps from a long distance?  You won’t want to miss todays Guest post by Clift!  He walks us through the process of “extending” the HD TV signal and the remote control of his HTPC up to a bedroom distant from the HTPC server.  A great how-to that would interest anyone with an HTPC or a desire to DIY!

NOTE:  This is a guest post by Clift.   Basic guidelines for writing and submitting a guest post at GeekTonic can be found here.
If you use extenders with your HTPC setup and have ever wished you could switch your TV input and have your HTPC desktop (or other application) available even though the server may be in the basement or a closet somewhere then this guide may be for you.  I have to admit, when I started this project it wasn’t necessarily for that reason.  My wife and I were building a playroom for my daughter and my first choice was to purchase a SageTV media extender (HD100 or HD200).  However, with the amount of TV time she actually gets we decided it may not be worth $200 to get another extender.  She asked why we couldn’t just use the server.  Being that she is not as techie as I am it was a valid question that I would never have asked.  I know the maximum length for VGA, HDMI and USB so I knew that it would never work.  But being the engineer that I am I just love a challenge.  Plus, the idea of saving some money is never a bad idea.
I had heard of VGA over CAT5 Ethernet cable so that is where I started.  Then I came across HDMI over CAT5e or CAT6.  In my opinion this made more sense as HDMI is the one cable to rule them all or I wouldn’t have to worry about a separate sound cable and HDCP issues.  A quick Google search revealed that USB over CAT5 was possible as well.  I have to admit though, the actual challenge of getting the equipment, running the cabling, setting up the server, and fabricating was tougher than I imagined.  About halfway through this project I figured someone somewhere could benefit from what I was about to learn.  Plus, Brent was nice enough to allow me to chronicle this and post it up on Geektonic for all the readers to see and hopefully get some ideas.  I repeat, though, my particular setup was to save some money.  So keep that in mind because this may not be the ideal way to get SageTV into another room.

Possible Uses

Before I get started on the technical stuff I also want to mention that this is my application but there are a number of possibilities for this as well, including (but not limited to):

  • Video On-Demand if using a USB IR receiver and Eventghost or Girder as an IR repeater for the cable box


  • Hulu desktop while still having your server be out of the way


  • Running Windows Media Center, XBMC, etc on your server but still be able to use your extender in the living room and elsewhere


  • Using the server for web browsing or gaming with a wireless or wired USB keyboard AND mouse


  • Using a cloned desktop to send control and watch your HTPC from another room


  • Using the Server as a client in another room (my actual implementation)

One of the hardest things was keeping costs low.  HDMI over Ethernet is usually over $100 for an HDMI repeater and receiver on both ends.  USB over Ethernet isn’t well documented and pre-built USB to Ethernet dongles are in the range of $45 or sometimes less, but may be of questionable quality.  Also, these devices over-promise their capabilities, and besides they usually take male and female USB to female Ethernet which is not what I wanted.  Often times they quote 150 feet, but good luck getting the USB signal that far.  And the bus-supplied 5V will not even make it half that far.  So it was either find HDMI over Ethernet cheap or build my own VGA over Ethernet cables out of parts from Radio Shack (ahem, I mean “The Shack”).  And then I would have to get a long stereo cable.  Luckily I was able to find HDMI over Ethernet for under $20 from monoprice.com.  Now this wasn’t exactly my ideal setup for one good reason: it’s a complete wall plate.  I wanted something that could fit in a standard keystone port or something I could modify a standard wall plate to accommodate so that I could have my USB over Ethernet on the same wall plate.  No dice.  Oh well, I was not complaining since this one got good reviews and the price was right.  At this point I had pretty much decided I was going to build the USB cable myself.  Some of the parts I needed I already had, but I have included in this guide the full parts list below.  Everything can be purchased from monoprice.com for cheap.
Prod ID

Description

Qty

Price

Total

5403
HDMI over CAT5E / CAT6 Extender Wall Plate (Pair) - Single Port
1
 $18.15
 $18.15
2161
50FT 350MHz UTP Cat5e RJ45 Network Cable - Yellow
1
 $4.43
 $4.43
2323
CAT 6 500MHz UTP 50FT Cable - Black
2
 $5.61
 $11.22
313
Cat5E RJ-45 Tool-less Keystone Jack
2
 $1.03
 $2.06
1101
Wall Plate for Keystone, 4 Hole -White
2
 $0.34
 $0.68
5431
USB 2.0 A Male to A Female Extension 28/24AWG Cable - 1.5ft
1
 $0.78
 $0.78
226
3.5 Inches USB 2.0 4 PORT INT/EXT DUAL HUB BAY
1
 $7.50
 $7.50
You can use whatever length you want, but be warned over 100ft or so you might run into trouble with the HDMI.  For USB I could not get a reliable signal at over 45ft total length (length of Ethernet cable run in the attic + length of the USB cable from the device + length of the USB to Ethernet cables).  While I was able to get a mouse to work, some other USB devices I tried gave me a “USB Device has malfunctioned” error.
Why do we need this stuff?

  • HDMI over CAT6 - This is the cheapest you’re going to find anywhere, but Monoprice sells good stuff so no worries.


  • 50 ft CAT6 cable – You need two of these in order for it to work.  I made the mistake of not reading everything and ended up getting only one CAT6 cable so I had to order another one.  Since HDMI is so picky about timing, etc it is better to go with CAT6.  Plus, at around 50ft, you should need CAT6 in order to be able to do 1080P


  • 50 ft CAT5e cable – This is going to be used for the USB over Ethernet


  • CAT5e RJ-45  Keystone Jacks – This is for the in-wall installation of the USB to Ethernet cables we will make later


  • USB 2.0 male to female extension – This is the cable we will cut and splice in order to make the USB to Ethernet cables


  • USB 2.0 Powered HUB – This is very important.  The hub needs to be powered.  The reason for this is that the 5V supplied power from your motherboard USB is not enough to make it 50ft.

As you can see the total for the above is just under $45 plus $5-10 for shipping.  I already had a USB hub, wall plates, and a USB cable.
Prerequisites

  • Make sure your USB device that you will remotely locate is installed and fully functional


  • Make sure your HDMI implementation is working, including sound and HDCP


  • Test the HDMI over CAT6 and USB over CAT5e before running cable through the walls/ceiling/attic/floor


Installation
Installing the HDMI extension is pretty straight forward.  The input and the output are specific, so make sure not to mix those up.  If you are running cables through the walls, one thing to note is that it is a good idea to mark which cable is which.  I did this by wrapping a piece of duct tape to both ends of one cable like this (this picture shows back of one of the HDMI wall plates):
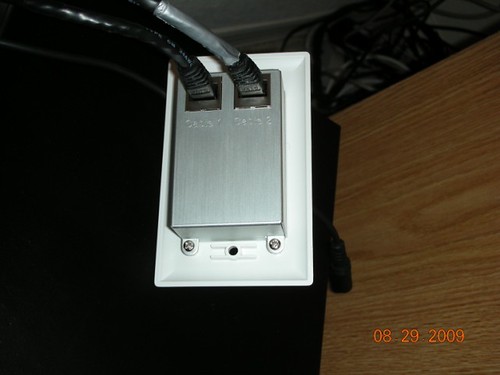
image1

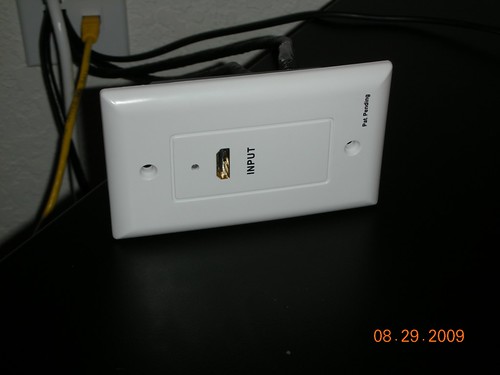
The rest is pretty standard.  You may want to tape over the bright LED that comes with the HDMI wall plate.
image2
For the USB installation I have detailed in steps below how I approached it:
1. Cut about 6-12” of cable on each end of the 50ft USB cable (or as long as you anticipate you will need on each end)
2. Strip about an inch off each end of the cables you just cut.
3. Cut the USB cable in half (or whatever ratio you want, but leave at least 6” of clearance on the shortest cable).
4. Strip about an inch off each end of the USB cable you just cut.
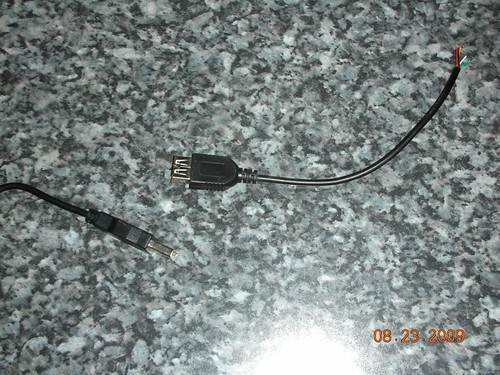
image3
USB connector is four pins but there is a fifth pin used for ID.  This cable is “married” or joined to the ground cable.  This is the pinout:

Pin
Wire
Color
Usage
Pin 1
Wire 1
Red
+5V DC
Pin 2
Wire 2
White
Data -
Pin 3
Wire 3
Green
Data +
Pin 4
Wire 4
Black
Ground
Wire 5
Yellow or Braided
ID

Another thing to remember is that the green and white wires, Data - and Data +, are twisted in the USB cable, so they should be twisted (paired) in the Ethernet/CAT5e cable.  Also, since the USB cable is 4-wire and the Ethernet cable is 8-wire it is actually possible to run 2 USB connections over one CAT5e cable.  Here is the pairing used for just one (use the others as you see fit):
USB Wire
Color


CAT5e Wire
Color
Wire 1
Red


Wire 7
Brown/White
Wire 2
White


Wire 3
Green/White
Wire 3
Green


Wire 6
Green
Wire 4, 5
Black & Yellow/Braided


Wire 8
Brown


USB Wire


CAT5e Wire


5. Strip the individual USB and Ethernet wires from the cables you cut in steps 1 and 3.
6. Using the chart in step 4, connect the USB cable wires to the CAT5e cable wires and then (optional) solder.  Be sure to insulate each connection, and then electrical tape the cable together or use shrink tubing.  NOTE: My cables look ugly!  I had them looking really good with shrink tubing and everything, but I ended up ripping everything apart while troubleshooting an issue (more on that later) but when I got it working, I was NOT about to rip the cables apart and do it again ;)
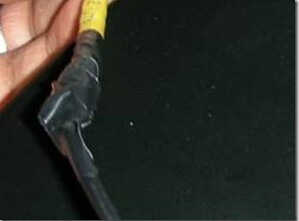
Shrink Tubing
7. Do this for both the male and female ends of the USB cable to the CAT5e patch we cut earlier.
8. Now strip about one inch from each end of the long CAT5e cable, but do not strip the individual wires.
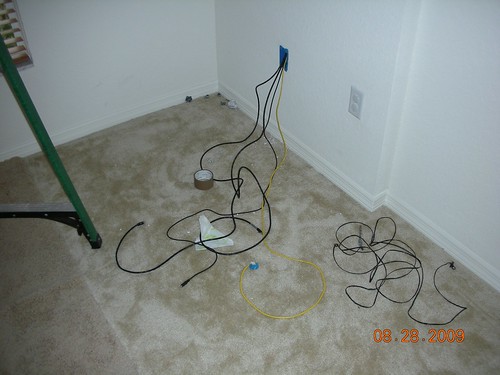
image5
9. Connect the wire to the keystone jack according to the color chart printed on it (use type B)
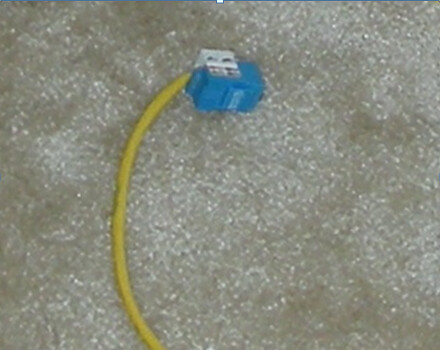
Keystone Jack
10. Do this for both ends.  Tidy up.
Now you are done making the USB cable and it is time to test it.  Connect the patch cables to either each end of the Ethernet wire and connect the male end to your PC and the female end to your device.  Good luck!  If you get an error when you connect them, then you need a powered USB hub.  Luckily we have one. You did order one didn’t you? 
Connect everything like so:
Device -> Female USB to Ethernet -> CAT5e -> Male USB to Ethernet -> Power USB Hub -> PC
Everything should be good now.  If it isn’t then you may have done something wrong.  Are you using a device with a very long cable?  When using the Microsoft eHome IR Receiver I had trouble getting the PC to recognize the device.  I ended up cutting 8 feet (yeah that’s right, 8 FEET!!!) of cable off and re-splicing the cable together.  Let me tell you, I was a bit apprehensive about doing that but it worked!  The total length of cable I ended up with from USB hub to actual device I estimate at ~45ft.  The only down side was that I ended up destroying my beautiful USB to Ethernet cables while troubleshooting….
That’s pretty much it.  The only thing that’s left to do is to make the installation clean by installing the wall plates, keystone jacks, etc.  Here are some pictures from my setup. 
I was able to achieve this for about a quarter of the cost of a new SageTV HD Theater extender, but at 4 times the work.  I enjoyed it, though.  And it turned out better than I thought.
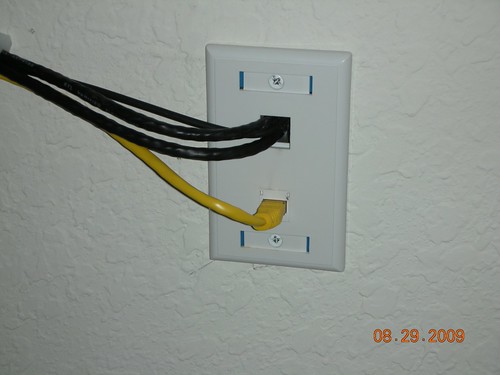
 image6
These are the wires coming out of wall plate.  I ended up caulking around the open hole in the top to keep my daughter from sticking things (and little fingers) in there.
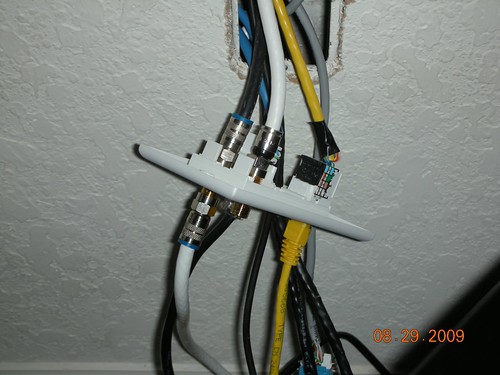
 image7
This is what things look like in the office now, 6-hole wall plate.  I hope I never have to relocate the server.
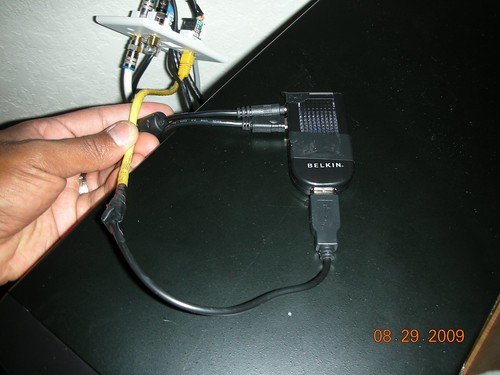
 image4
Here is a picture of the USB to Ethernet cable coming out of the wall keystone jack and going into the powered USB Hub.
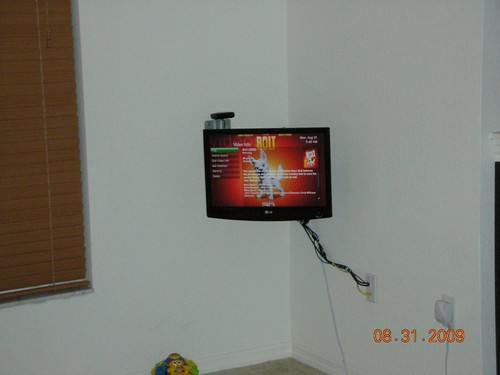

image9

This is the final product.  I ended up running a separate audio cable because I had trouble getting HDMI audio reliably out of the NVIDIA video card.  I could get audio out of the Radeon HD3200 IGP, but I could not get smooth video.  All cables are anchored/tucked for kid friendliness (I hope).
About Clift:  Clift is married with a 19 month old daughter.  He has a Bachelor's of Science in Aerospace Engineering and is currently working at a Nuclear Power Station in Florida as a lead quality assurance auditor.  He also wrote about his HTPC setup this summer – be sure and check it out if you missed it.
Tuesday, August 25, 2009

Windows 7 Commercial Skipping – with DVRMSToolbox & ShowAnalyzer

Easy one-button Commercial Skipping is one of the great features of Home Theater PCs and Windows 7 has that capability too.  Check out this how-to from from Hacking Windows 7 Media Center by Michael Healy
Now that ShowAnalyzer has support for WTV just how do we get this setup to skip commercials for us automatically in Windows 7 Media Center? The solution is actually surprisingly simple. Before we get started have a look at our guide to installing ShowAnalyzer and we’ll cover more of the options for setting it up to work with DVRMSToolbox in this article. Once we’re done we’ll have a virtually hand free solution to skipping commercials in Windows 7 Media Center.
To get started we need to have ShowAnalyzer installed as well as DVRMSToolbox and the Windows 7 Media Center Addin. Be sure to download and install the latest version of DVRMSToolbox as well as the 7MC adding as it’s not included in the package by default. Once you’ve got all three installed let’s get started configuring each program.
dvrmstoolbox analyzer
Start by opening DVRMSToolbox’s DVRMSToMPEGSettings and on the first tab set your preferred Analyzer to SAV1 for ShowAnalyzer (version 1). Then switch to the MC Addin tab and make sure that the Commercial Skip option is enabled.
MC Addin
Finally, under the Commercial Skip tab make a note of the Commercial Path so we can setup ShowAnalyzer to use the same path when saving it’s commercial XML files.
Read the rest of this entry at Hack7MC
Catch more of Michael's reflections on Windows 7 Media Center at Hack7MC.  I’ve followed Michael’s articles for quite a while now and am pleased that Michael has agreed to contribute some of his excellent Windows 7 Media Center articles to GeekTonic for the next few weeks.