
Remote Locating your HTPC, or accessing your HTPC Server remotely with video and a remote control.
Looking for a relatively inexpensive way to connect a TV in your home to your HTPC server? Perhaps from a long distance? You won’t want to miss todays Guest post by Clift! He walks us through the process of “extending” the HD TV signal and the remote control of his HTPC up to a bedroom distant from the HTPC server. A great how-to that would interest anyone with an HTPC or a desire to DIY!
NOTE: This is a guest post by Clift. Basic guidelines for writing and submitting a guest post at GeekTonic can be found here.
If you use extenders with your HTPC setup and have ever wished you could switch your TV input and have your HTPC desktop (or other application) available even though the server may be in the basement or a closet somewhere then this guide may be for you. I have to admit, when I started this project it wasn’t necessarily for that reason. My wife and I were building a playroom for my daughter and my first choice was to purchase a SageTV media extender (HD100 or HD200). However, with the amount of TV time she actually gets we decided it may not be worth $200 to get another extender. She asked why we couldn’t just use the server. Being that she is not as techie as I am it was a valid question that I would never have asked. I know the maximum length for VGA, HDMI and USB so I knew that it would never work. But being the engineer that I am I just love a challenge. Plus, the idea of saving some money is never a bad idea.
I had heard of VGA over CAT5 Ethernet cable so that is where I started. Then I came across HDMI over CAT5e or CAT6. In my opinion this made more sense as HDMI is the one cable to rule them all or I wouldn’t have to worry about a separate sound cable and HDCP issues. A quick Google search revealed that USB over CAT5 was possible as well. I have to admit though, the actual challenge of getting the equipment, running the cabling, setting up the server, and fabricating was tougher than I imagined. About halfway through this project I figured someone somewhere could benefit from what I was about to learn. Plus, Brent was nice enough to allow me to chronicle this and post it up on Geektonic for all the readers to see and hopefully get some ideas. I repeat, though, my particular setup was to save some money. So keep that in mind because this may not be the ideal way to get SageTV into another room.
Possible Uses
Before I get started on the technical stuff I also want to mention that this is my application but there are a number of possibilities for this as well, including (but not limited to):-
Video On-Demand if using a USB IR receiver and Eventghost or Girder as an IR repeater for the cable box
-
Hulu desktop while still having your server be out of the way
-
Running Windows Media Center, XBMC, etc on your server but still be able to use your extender in the living room and elsewhere
-
Using the server for web browsing or gaming with a wireless or wired USB keyboard AND mouse
-
Using a cloned desktop to send control and watch your HTPC from another room
-
Using the Server as a client in another room (my actual implementation)
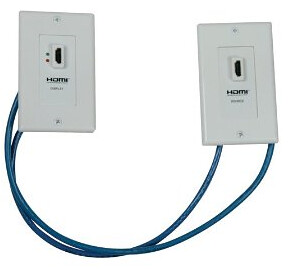
One of the hardest things was keeping costs low. HDMI over Ethernet is usually over $100 for an HDMI repeater and receiver on both ends. USB over Ethernet isn’t well documented and pre-built USB to Ethernet dongles are in the range of $45 or sometimes less, but may be of questionable quality. Also, these devices over-promise their capabilities, and besides they usually take male and female USB to female Ethernet which is not what I wanted. Often times they quote 150 feet, but good luck getting the USB signal that far. And the bus-supplied 5V will not even make it half that far. So it was either find HDMI over Ethernet cheap or build my own VGA over Ethernet cables out of parts from Radio Shack (ahem, I mean “The Shack”). And then I would have to get a long stereo cable. Luckily I was able to find HDMI over Ethernet for under $20 from monoprice.com. Now this wasn’t exactly my ideal setup for one good reason: it’s a complete wall plate. I wanted something that could fit in a standard keystone port or something I could modify a standard wall plate to accommodate so that I could have my USB over Ethernet on the same wall plate. No dice. Oh well, I was not complaining since this one got good reviews and the price was right. At this point I had pretty much decided I was going to build the USB cable myself. Some of the parts I needed I already had, but I have included in this guide the full parts list below. Everything can be purchased from monoprice.com for cheap.
Prod ID | Description | Qty | Price | Total |
5403 | HDMI over CAT5E / CAT6 Extender Wall Plate (Pair) - Single Port | 1 | $18.15 | $18.15 |
2161 | 50FT 350MHz UTP Cat5e RJ45 Network Cable - Yellow | 1 | $4.43 | $4.43 |
2323 | CAT 6 500MHz UTP 50FT Cable - Black | 2 | $5.61 | $11.22 |
313 | Cat5E RJ-45 Tool-less Keystone Jack | 2 | $1.03 | $2.06 |
1101 | Wall Plate for Keystone, 4 Hole -White | 2 | $0.34 | $0.68 |
5431 | USB 2.0 A Male to A Female Extension 28/24AWG Cable - 1.5ft | 1 | $0.78 | $0.78 |
226 | 3.5 Inches USB 2.0 4 PORT INT/EXT DUAL HUB BAY | 1 | $7.50 | $7.50 |
You can use whatever length you want, but be warned over 100ft or so you might run into trouble with the HDMI. For USB I could not get a reliable signal at over 45ft total length (length of Ethernet cable run in the attic + length of the USB cable from the device + length of the USB to Ethernet cables). While I was able to get a mouse to work, some other USB devices I tried gave me a “USB Device has malfunctioned” error.
Why do we need this stuff?
-
HDMI over CAT6 - This is the cheapest you’re going to find anywhere, but Monoprice sells good stuff so no worries.
-
50 ft CAT6 cable – You need two of these in order for it to work. I made the mistake of not reading everything and ended up getting only one CAT6 cable so I had to order another one. Since HDMI is so picky about timing, etc it is better to go with CAT6. Plus, at around 50ft, you should need CAT6 in order to be able to do 1080P
-
50 ft CAT5e cable – This is going to be used for the USB over Ethernet
-
CAT5e RJ-45 Keystone Jacks – This is for the in-wall installation of the USB to Ethernet cables we will make later
-
USB 2.0 male to female extension – This is the cable we will cut and splice in order to make the USB to Ethernet cables
-
USB 2.0 Powered HUB – This is very important. The hub needs to be powered. The reason for this is that the 5V supplied power from your motherboard USB is not enough to make it 50ft.
As you can see the total for the above is just under $45 plus $5-10 for shipping. I already had a USB hub, wall plates, and a USB cable.
Prerequisites
-
Make sure your USB device that you will remotely locate is installed and fully functional
-
Make sure your HDMI implementation is working, including sound and HDCP
-
Test the HDMI over CAT6 and USB over CAT5e before running cable through the walls/ceiling/attic/floor
Installation
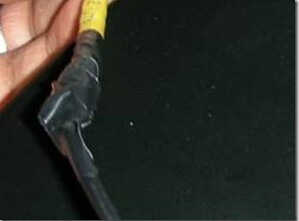
Installing the HDMI extension is pretty straight forward. The input and the output are specific, so make sure not to mix those up. If you are running cables through the walls, one thing to note is that it is a good idea to mark which cable is which. I did this by wrapping a piece of duct tape to both ends of one cable like this (this picture shows back of one of the HDMI wall plates): 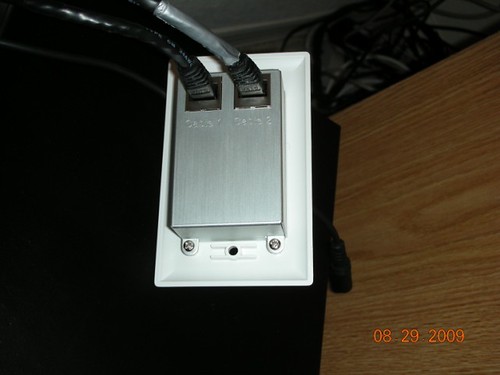
The rest is pretty standard. You may want to tape over the bright LED that comes with the HDMI wall plate.
For the USB installation I have detailed in steps below how I approached it:
1. Cut about 6-12” of cable on each end of the 50ft USB cable (or as long as you anticipate you will need on each end)2. Strip about an inch off each end of the cables you just cut.
3. Cut the USB cable in half (or whatever ratio you want, but leave at least 6” of clearance on the shortest cable).
4. Strip about an inch off each end of the USB cable you just cut.
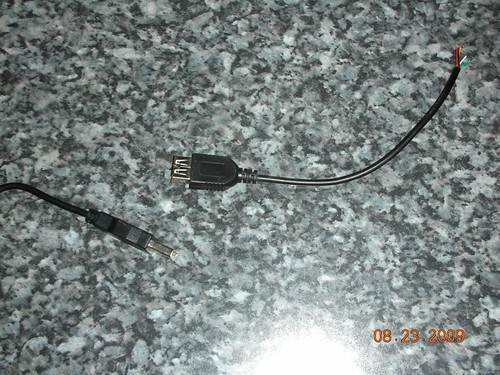
USB connector is four pins but there is a fifth pin used for ID. This cable is “married” or joined to the ground cable. This is the pinout:
Pin | Wire | Color | Usage |
Pin 1 | Wire 1 | Red | +5V DC |
Pin 2 | Wire 2 | White | Data - |
Pin 3 | Wire 3 | Green | Data + |
Pin 4 | Wire 4 | Black | Ground |
Wire 5 | Yellow or Braided | ID |
Another thing to remember is that the green and white wires, Data - and Data +, are twisted in the USB cable, so they should be twisted (paired) in the Ethernet/CAT5e cable. Also, since the USB cable is 4-wire and the Ethernet cable is 8-wire it is actually possible to run 2 USB connections over one CAT5e cable. Here is the pairing used for just one (use the others as you see fit):
USB Wire | Color | CAT5e Wire | Color | |
Wire 1 | Red | Wire 7 | Brown/White | |
Wire 2 | White | Wire 3 | Green/White | |
Wire 3 | Green | Wire 6 | Green | |
Wire 4, 5 | Black & Yellow/Braided | Wire 8 | Brown |
USB Wire | CAT5e Wire | |||||
6. Using the chart in step 4, connect the USB cable wires to the CAT5e cable wires and then (optional) solder. Be sure to insulate each connection, and then electrical tape the cable together or use shrink tubing. NOTE: My cables look ugly! I had them looking really good with shrink tubing and everything, but I ended up ripping everything apart while troubleshooting an issue (more on that later) but when I got it working, I was NOT about to rip the cables apart and do it again ;)
7. Do this for both the male and female ends of the USB cable to the CAT5e patch we cut earlier.
8. Now strip about one inch from each end of the long CAT5e cable, but do not strip the individual wires.
9. Connect the wire to the keystone jack according to the color chart printed on it (use type B)
10. Do this for both ends. Tidy up.
Now you are done making the USB cable and it is time to test it. Connect the patch cables to either each end of the Ethernet wire and connect the male end to your PC and the female end to your device. Good luck! If you get an error when you connect them, then you need a powered USB hub. Luckily we have one. You did order one didn’t you?
Connect everything like so:
Device -> Female USB to Ethernet -> CAT5e -> Male USB to Ethernet -> Power USB Hub -> PC
Everything should be good now. If it isn’t then you may have done something wrong. Are you using a device with a very long cable? When using the Microsoft eHome IR Receiver I had trouble getting the PC to recognize the device. I ended up cutting 8 feet (yeah that’s right, 8 FEET!!!) of cable off and re-splicing the cable together. Let me tell you, I was a bit apprehensive about doing that but it worked! The total length of cable I ended up with from USB hub to actual device I estimate at ~45ft. The only down side was that I ended up destroying my beautiful USB to Ethernet cables while troubleshooting….
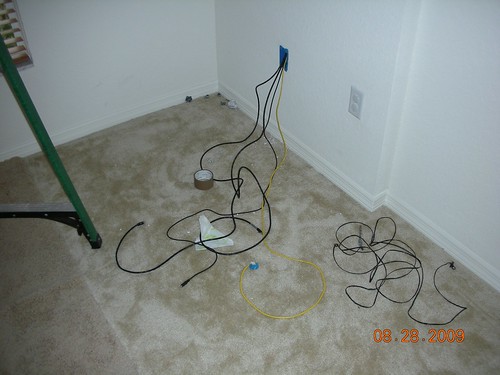
That’s pretty much it. The only thing that’s left to do is to make the installation clean by installing the wall plates, keystone jacks, etc. Here are some pictures from my setup.
I was able to achieve this for about a quarter of the cost of a new SageTV HD Theater extender, but at 4 times the work. I enjoyed it, though. And it turned out better than I thought.
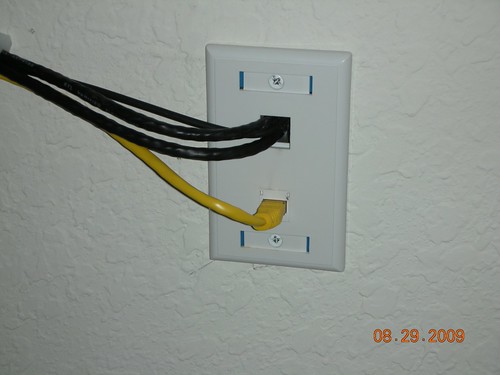
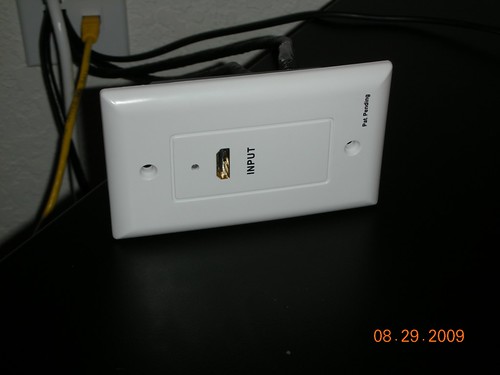
These are the wires coming out of wall plate. I ended up caulking around the open hole in the top to keep my daughter from sticking things (and little fingers) in there.
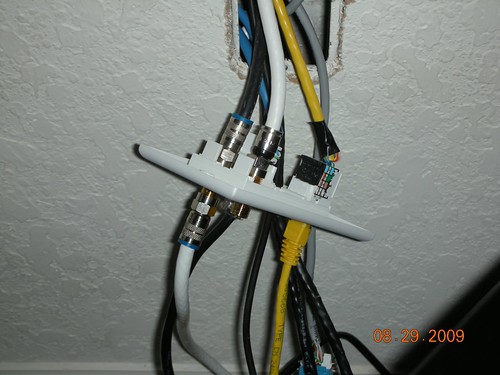
This is what things look like in the office now, 6-hole wall plate. I hope I never have to relocate the server.
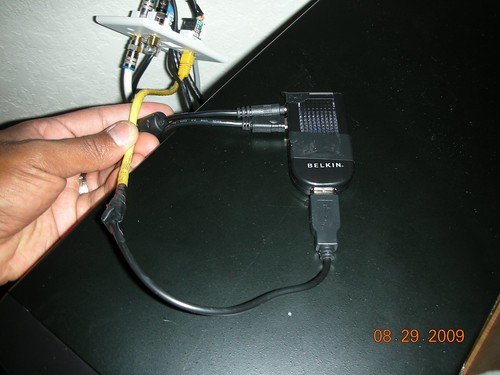
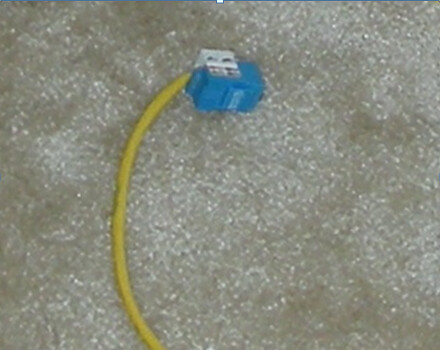
Here is a picture of the USB to Ethernet cable coming out of the wall keystone jack and going into the powered USB Hub.
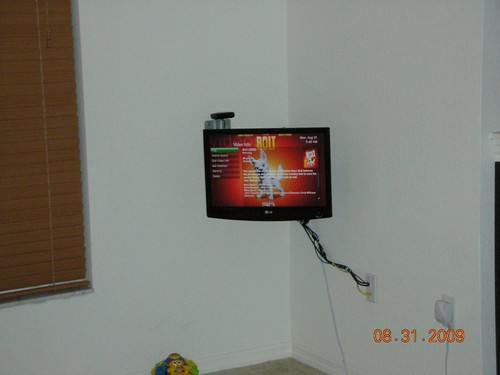
This is the final product. I ended up running a separate audio cable because I had trouble getting HDMI audio reliably out of the NVIDIA video card. I could get audio out of the Radeon HD3200 IGP, but I could not get smooth video. All cables are anchored/tucked for kid friendliness (I hope).