

My goal in the multi-part series is to provide those curious about SageTV all of the basics they need to get started, learn more about what makes SageTV different, what SageTV can do and finally a review of SageTV 7.
SageTV 7 - The Getting Started Guide:
SageTV 7 The Getting Started Guide - Part 1
SageTV 7 The Getting Started Guide – Part 2
SageTV 7 The How to Install Hauppauge HD-PVR with SageTV
List of all SageTV 7 Plugins
Setting up SageTV 7 Commercial Skipping
Before we get started though lets go through some basics:
What is SageTV?
SageTV is a Home Theater PC (HTPC) software that performs DVR functions (recording TV, time-shifting TV), playback of movies (DVDs, Blu-rays, ripped movies on hard drive etc), music, photos and more. SageTV works with Windows, Windows Home Server, Linux and Mac (V6 only).Want to Avoid a Big, Noisy Computer in Living Room? Extenders are for You!
Want a small, silent box (extender) instead of a computer in your living room? SageTV offers an excellent extender for just that purpose. But to use it as a full-fledged TV recording HTPC, you’ll need at least one computer with SageTV installed. This computer will be your HTPC server.Computers can be Extenders Too
Want to use multiple computers in the house like an extender? You can do that with SageTV. You’ll still have one HTPC server, but can then have as many additional HTPCs in the house that work just like extenders (softsled for those of you who followed MediaCenter a few years ago). These additional HTPCs will use SageTV Client.Why HTPC instead of TiVo or Cable DVR?
Well I could devote an entire article to this topic. But the big reasons to use an HTPC over the cable box and/or TiVo are as follows:- Complete control over your content. You record it, save it as long as you like, convert it for playback on your mobile device etc. You can even stream your media to your iPad/iPod/iPhone!
- Commercial Skip. With a simple installation of a 3rd party commercial skip program your HTPC can detect commercials and you can skip them with a click of a button or even automatically.
- Expandable. Want to watch 1 show and record 5 or more at the same time? You can do it with the right number of tuners in your HTPC server. Want to save a seasons worth of your favorite shows and watch them in the summer when you have more time? It’s up to you on how big and how many hard drives you include on your HTPC. Bottom line is you can expand your HTPC as you want.
- Evolve as new features come along. You won’t have to wait for your cable company to come out of the stone ages – your HTPC gets new features all the time with new updates. Online streaming of content, Picasa plugins and much more is available to you with an HTPC.
SageTV Installation
Review the SageTV System Requirements. You’ll find all officially supported tuners, minimum hardware requirements (exceed these if possible), and other required components.Download the appropriate SageTV version from SageTV’s Download Page. There are different SageTV versions for:
- Windows (XP, Vista, Windows 7)
- Windows Home Server
- Linux
- Mac (Note: the Mac version of SageTV is stuck in SageTV 6 as no version 7 is currently available)
When you download and install SageTV, you’ll be getting a copy of the latest version of the SageTV user manual available from your start menu. But you can also access the latest SageTV user manual here at any time.
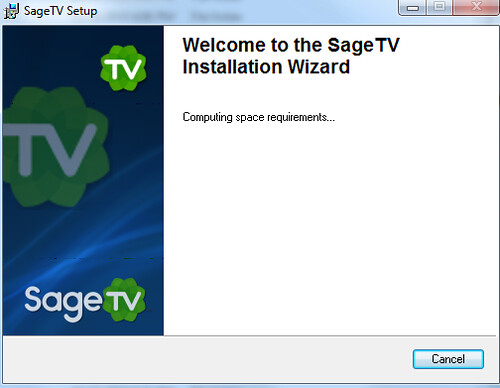
Run the SageTV Setup exe file you downloaded. You’ll see the many installation wizard screens:
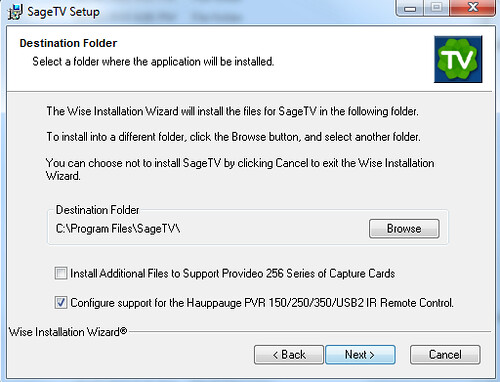
Choose your destination folder (normally just use the default), check either of the two boxes as noted (I don’t mess with these two boxes during install) and continue through the wizard’s steps:
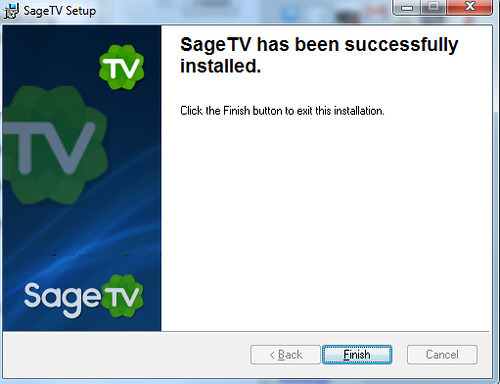
Once you get to this screen you’re finished with the installation. Pretty easy so far. Next it’s time to set up the SageTV Service. If you’re like most techie’s you know what a Service on the computer is, but in case you’re not, here’s a quick explanation of what this does:
Running SageTV as a service means that the recording function of SageTV is separated from the playback function and user interface. As the SageTV will tell you, this means that:
- The service is automatically started (and optionally restarted) by Windows
- You do not have to be logged in for SageTV to be recording something
- Exiting the User interface does not interrupt recordings
I personally recommend you run SageTV as a service. You can set up the Service from the following “SageTV Service Control” interface that pops up at the end of the SageTV installation process:
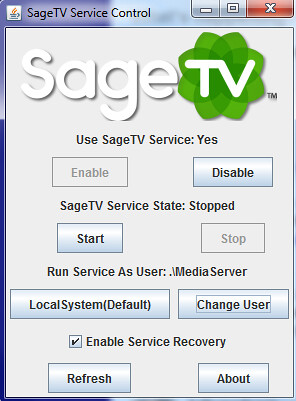
Click on “Enable” to enable Service Mode.
Then select “Change User” to configure the service with an account that has network privileges. My HTPC server only has a single user – the administrator called “MediaServer”.
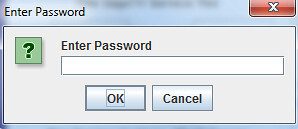
Once you’ve input the username, input the password (must be the same password as you use for your Windows account of course. You’ll be asked to input this once and then again to confirm
Once you have the user and password input, check the “Enable Service Recovery” box and then click on the “Start” button to begin the service. This service will run automatically whenever your HTPC servers starts up going forward.
Time to start up SageTV. Here’s the steps you’ll go through the very first time:
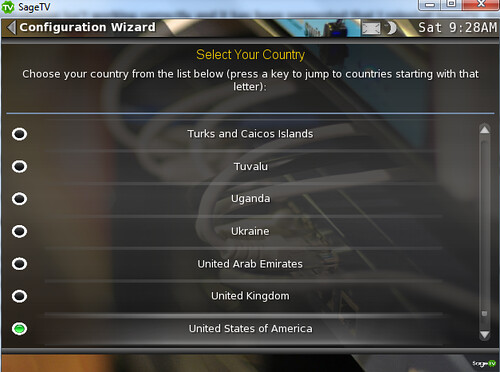
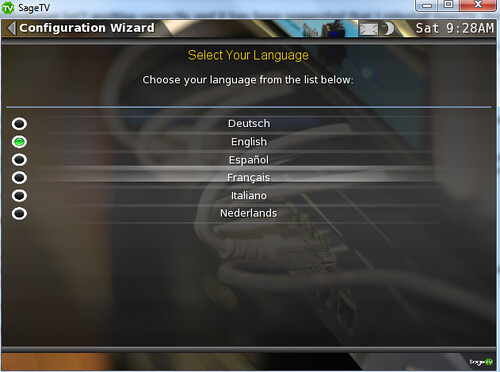
Pick your country and language
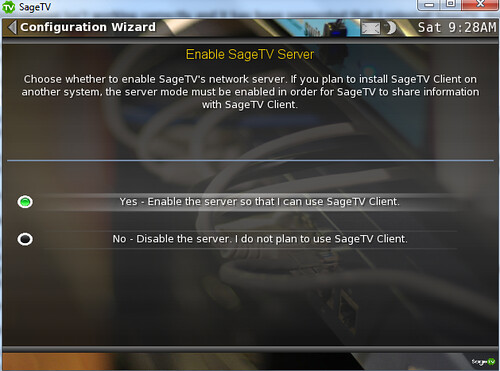
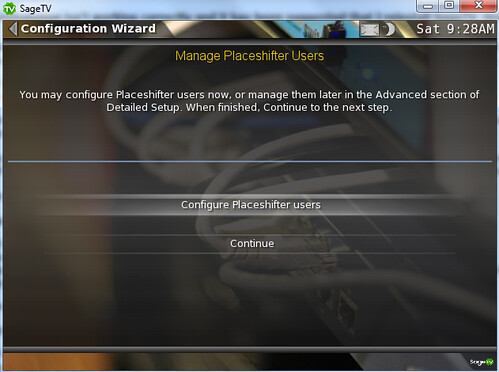
Enable the SageTV Server & then enable the use of an extender or placeshifter client – for nearly everyone, you should enable both of these

Go ahead and set up your placeshifter username & password in case you’ll use Placeshifter (a program you can install on a laptop or other computer you’ll use outside your home to access your SageTV UI and content – kind of like Slingbox!
Note: You can change these and nearly all other settings later if you change your mind.
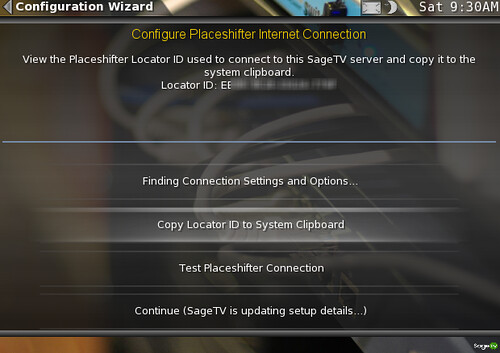
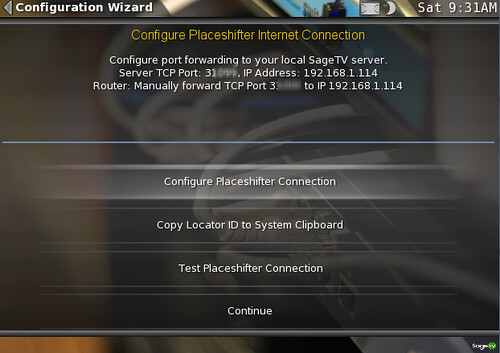
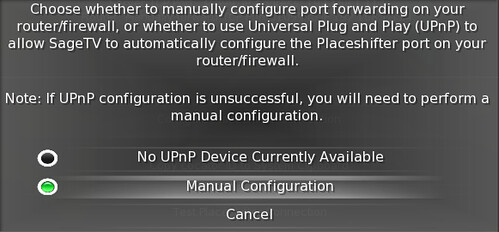
If you’re setting up the Placeshifter connection, you’ll want to note the “locator ID” and configure the placeshifter connection (Port used etc).
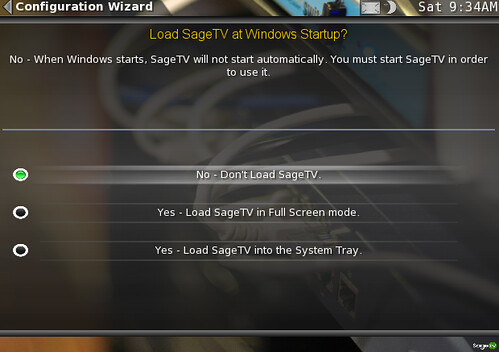
Next you can choose whether to load SageTV at windows startup (I recommend you do this so your recordings happen when the computer is on). Choose between full-screen mode or have SageTV load to the system tray.
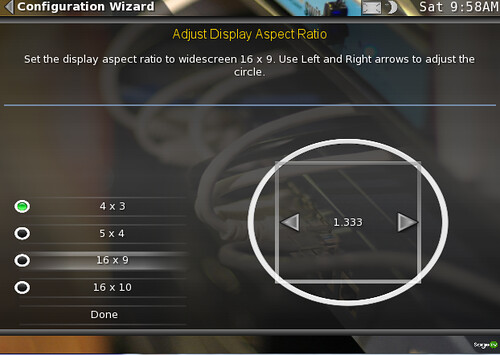
Configure aspect ratio
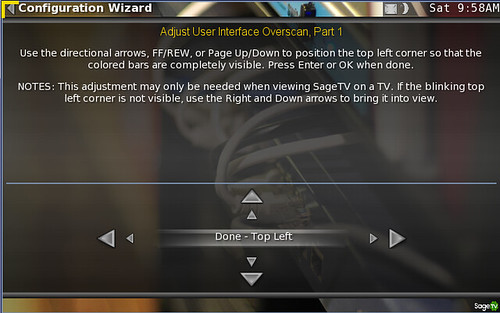
Adjust overscan by pointing the top left and bottom right corner indicators to the proper place on your TV.
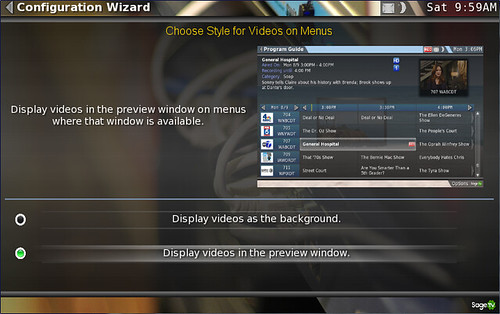
Choose whether you want to show video on the menuse or not. and whether you want it to display in the background or in a preview window. This really only matters when you leave a show playing but exit out to the menus without stopping playback.

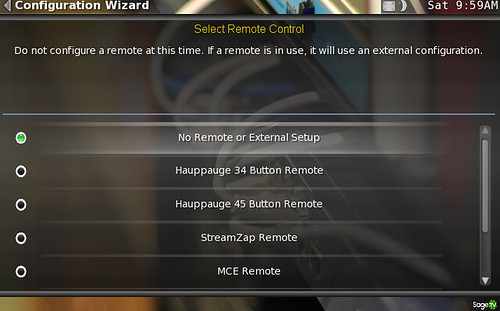
Select your remote control from the list of devices. If it’s an IR (Infrared) remote and isn’t listed you can still configure it to work with SageTV. USBUIRT is an option of course.
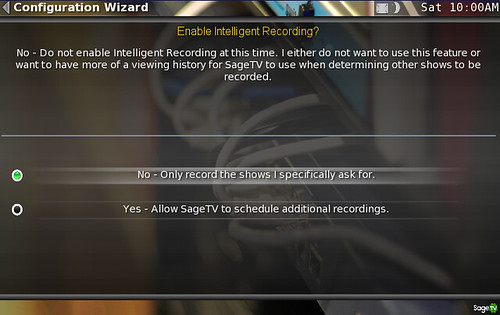
If you’re a TiVo kind of guy and want your HTPC to learn what you like and start recording based on that you might be interested in “Intelligent Recording.” I personally don’t like my HTPC recording anything I don’t tell it to, so I always set this to no.
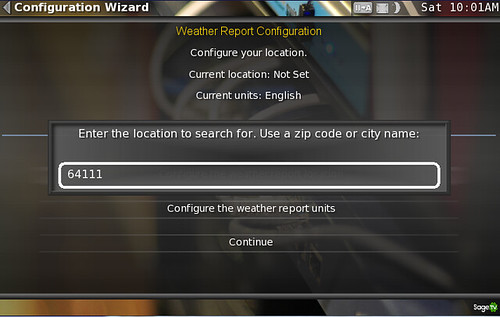
Configure your weather location & currency units for the weather page.
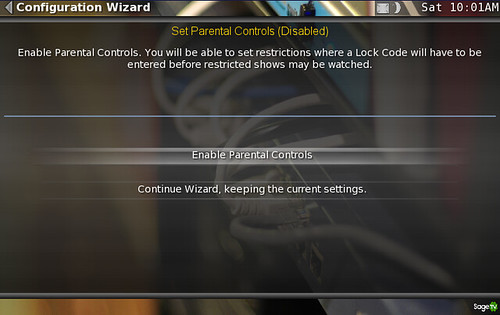
Enable (or not) parental controls to restrict access to your TV.
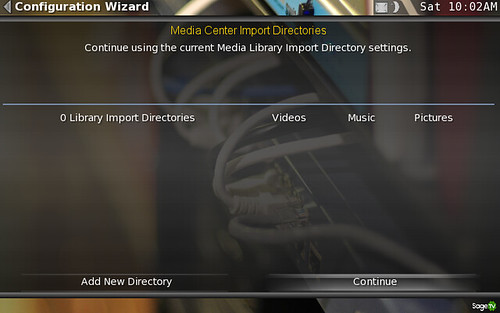
Choose the import directories on your network for video/movies, music and pictures
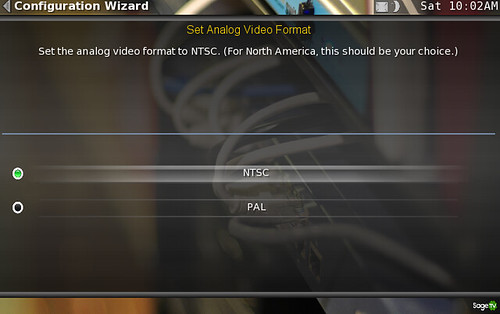
Choose youre video format (NTSC or PAL)
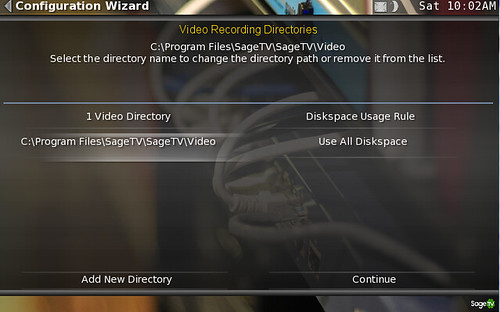
Choose your video recording directories. This is an important one. I recommend you have on (or two) hard drives specifically for TV recordings and nothing else. Not a requirement, but it makes disk access more efficient in my opinion. You can choose multiple directories and disks including network drives or other computers connected to the network. Just keep in mind the speed of the connection given the read/write requirements of your HTPC.
That’s it for part 1 of this SageTV 7 Getting Started Guide. In part 2 we’ll begin adding the TV tuners and configuring more of the settings. It won’t be long and we’ll get into the fun stuff. After that you’ll get a full review of SageTV 7 including what’s new, what's good and what still needs work.
Stay tuned.