
Our second submission for the GeekTonic Media Gadget Showcase Series is an impressive Home Theater Setup. Dennis shows us the unfinished basement that has been transformed into a functional home theater. And to make this home theater room even more interesting, he utilizes a Home Theater PC to power the media behind the scenes. Read on for his great writeup with photos to share.
NOTE: This is a guest post by Dennis Heinle. To read more about how to submit your photos and/or writeups for the GeekTonic Media Gadget Showcase Series, read this. Basic guidelines for writing and submitting a guest post at GeekTonic can be found here.
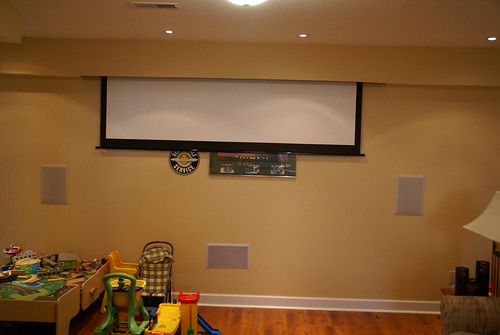
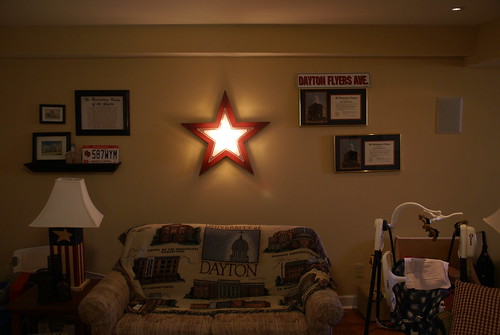
I have always wanted a big screen TV. I can remember when I was kid going to B&B Electronics with my older brother to look at car stereo equipment and I was just in awe of those 50" rear projection monsters. When we finally decided to finish the basement last summer I started to think about how I can integrate a Home Theater into it. I didn't expect to finish the HT as soon as I did, I just wanted to put the pieces in place during construction so it could be finished at a later date. I decided on a layout and then started to rough-in speaker wire with low voltage boxes. I also created and area for an in-wall av rack.
Goal
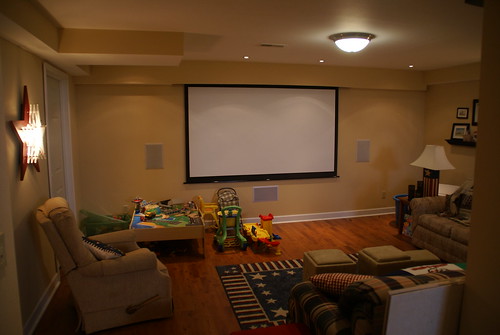
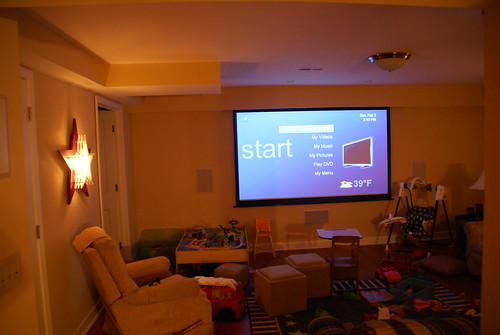
Create a budget friendly home theater with great WOW factor. I really wanted this to happen. Push 1 button, all equipment turns on, screen drops down and lights dim to the correct settings. I am almost there, I have all the hardware just need to finish setting up the lighting. My wife also had some goals for this. She didn't want any wires anywhere, period. It had to look clean and be un-obtrusive. If we were not watching a movie she didn't want to see any equipment, period. Melanie is thrilled with the outcome, it just looks awesome and can be "put away" very easily. It also had to be easy to use.
Framing
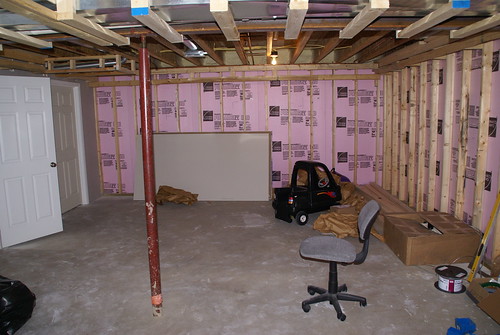
My dad and I built the entire basement and did all the work except the drywall so we had a lot of freedom to place things where they would fit. I did a lot of research online before construction to figure out speaker placement. Crutchfield.com has a great resource on speaker placement, even for in-wall or ceiling speakers.
Speakers
Based on Melanie's requirements I had to go with in-wall speakers. I had bought a lot of stuff from parts express in college and was always happy with their gear. I purchased the following speakers.
- Fronts - 8” Elite series
- Center - Dual 5.25” Ultra Series
- Surrounds - 6.5” Elite series
- Subwoofer - 10” 125 watt powered sub
- I also bought all the in-wall cable (Speaker wire, HDMI, Component, Sub, etc...) from partsexpress.com
They sound great and I am very very happy with them. I thought they were very reasonably priced as well.
Receiver
I needed a new receiver and started doing a ton of research on-line. I wanted a receiver that would do HDMI switching with audio and upconversion on the HDMI output. I really only wanted a 5.1 receiver because I honestly never thought I would have a need for it. I found a receiver that did everything I wanted and much more. I landed up with an Onkyo TX-SR606. I found a killer deal on it at Circuit City (of all places, before bankruptcy) by using shopper.com. The on-line price was about $130 less than the in store price but they did price match it.

DVD
I started out with a cheap Cyberhome DVD player for movies and let the receiver upconvert it 1080i.
Blu-ray
The day after Thanksgiving I got a Sony BDP-S350 1080p Blu-ray Player from Bestbuy for only $200. I really like how this blu-ray player support BD-Live which means it connects to the internet and you can interact with features on the disk. I have yet to use this but I see the HSM3 has this feature. I'll have to check it out with my daughter.
Projector
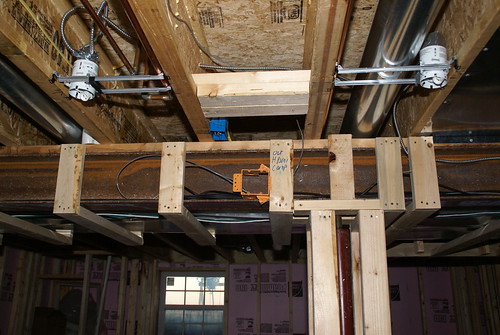
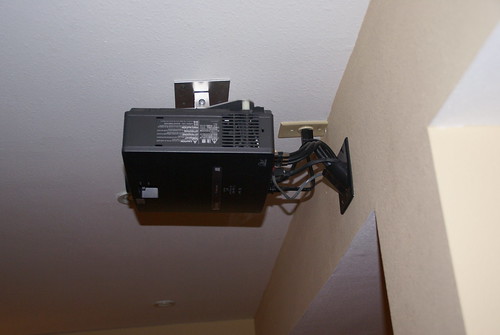
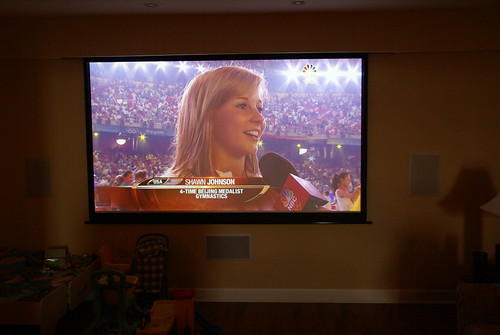
I used projectorcentral.com to do all my projector research, it was a great resource and I love the projection calculator. You select the model of projector you want, enter the distance you have to work with and it will tell you what size screen you can get with the built-in zoom on that projector. I read all the reviews and settled on the Mitsubishi HC-1500, an editors pick. It is a 720p projector but looks great. I really didn't think I would buy a Blu-Ray or HD-DVD (remember that?) player anytime soon, so I was ok with 720p and it will go up to 1080i. I ceiling mounted the projector in front of a beam which gave me perfect access to hide wires. I was not exactly sure how I was going to use the projector so I ran HDMI, Component and VGA to it. So far I have only used HDMI.
Screen While on projectorcental.com a saw some reviews of electric screens. I figured they were out of my price range but looked anyway, I was happily surprised. Elite screens has an economy line which is very reasonable. I picked up a 100" 16:9 Elite Spectrum Motorized Projector Screen from newegg.com for about $250 shipped. It's a white screen, not the preferred gray for movies but was cheap and I was going for the wow factor of an electric screen. While framing the basement I made a soffet in the front of the room and built an area for the screen to fit up into. So when the screen is up, you see nothing. It has an IR remote and a remote trigger.
Media Center
My major problem with the HT was my media center. I had been a Beyond TV / Beyond Media user for about 5 years and loved it. It always worked and had a very high WAF. My problem was I only had it setup on 2 TV's. I really did not want to build another PC for the HT. It would be somewhat costly, be used rarely and I had to figure out how to get HDMI to work without any HDCP problems. I was dreading building another PC for this.
I started looking into alternatives and found SageTV. I saw their new STX-HD100 extender and thought it would be perfect. I started doing some research on it and read a review on GeekTonic. I started reading more reviews on the SageTV Forums and was hooked. I was hesitant to switch to Sage because of BTV's high WAF, but gave it a shot anyway. I found Geektonic to be a great resource for me as I moved to SageTV. Brent had a lot of great articles on moving my BTV recordings, setting up comskip, setting up webadmin, etc... Going to geektonic.com was much easier than searching the SageTV forums for me.
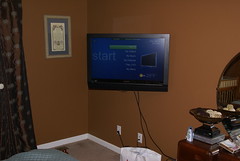
So far SageTV has been awesome, I love all the little add-ins and tweaks for it. Since then I have bought a SageTV HD-200 for the bedroom and am looking at getting a 3rd for the living room.
I am now a huge fan of extenders and love how they use very little power compared to a full PC.
Lighting
Lighting was very important to me as I wanted that perfect theater experience. Low side lights, task lighting etc... I found a couple of great articles on hometheatermag.com that explained the basics and I ran with it from there. I installed a Lutron Lighting Spacer system that has 5 zones and can be controlled by the Harmony remote. I still have some issues with setting up my scenes, so it does not work perfectly yet, but can dim the lights from the remote. Very cool. I am also a Disney fanatic and while searching for some other items from mousesurplus.com I found wall scones for Disney's All-Star Movie resort. I thought they were perfect and bought 2 for the side lighting. I also installed 4 - 3" can lights in 2 rows. 1 row to highlight the front wall when the screen was up and second as task lighting above the main seating area. This way the movie looks great but I can still find the popcorn and the remote.
Use
I was concerned that I would build the Home Theater and it would not get used very much. It was done sometime in September 2008 and I already have 360 hours on the projector lamp. Needless to say we use it all the time. We have had a lot of people over this year for baptisms, birthdays, wedding showers etc... and we always find ourselves in the basement. So far no real problems with the setup.
Total price
Here is a breakdown of the cost.
Onkyo Receiver - $380
STX-HD100 - $200
Sony BDP-350 $200
Mitsi HC-1500 $780
100" Elite Screen $250
Lutron Lighting controls ~$900 retail
Harmony One $170
Dayton Audio Speakers and Sub ~$500
Speaker wire ~$80
In-wall subwoofer cables ~$50
In-wall HDMI, Component, VGA cables ~$75
Things to finish up
As with any project there is always some things to work on / fix / setup.
I need to install an IR repeater - will allow for a better remote control experience
I need to make and install a door for the AV In-wall cabinet
I need to configure the Lutron lighting screens
I need to configure the screen to drop down / up when the projector is turned on / off
Check out all of the home theater setup photos in full-screen on flickr. And more awesome photos including Dennis's at the GeekTonic flickr group.
About Dennis: "Dennis is a geek, working with technology since he got his first computer in 1983, a Commodore64. He works as a Enterprise systems administrator in St Louis, married, 3 kids and is addicted to Walt Disney World." You can find more of Dennis' musings on technology at his blog and by following him on twitter. Thanks goes out to Dennis for sharing with us his new Home Theater Setup - be sure and ask any questions you have for Dennis in the comments below.
If you'd like to have your setup or media gadgets highlighted, and want a chance to win some Amazon.com gift certificates read the guidelines for submission here. We're looking for things as simple as a few photos of your favorite media-related gadgets or as elaborate as the home theater setup above and Sodarkangels HTPC build from last week. Either way, join in on the GeekTonic flickr group and upload your media gadget photos!